
Basic Settings
SEO & OG Meta Settings
To adjust your website's SEO settings, navigate to "General settings > SEO Settings."
Under SEO and OG Meta Settings:
- Site Meta Tags: Set meta tags for your website, with support for multilingual content.
- Site Meta Description: Establish a meta description for your website, with multilingual capabilities.
- OG Meta Title: Configure OG meta titles for your website, supporting multilingual content. Adding this OG meta will display your website details on social media.
- OG Meta Description: Define an OG meta description for your website.
- OG Meta Site Name: Specify an OG meta site name for your website.
- OG Meta URL: Set an OG meta URL for your website.
- OG Meta Image: Upload an OG meta image for your website. Including this OG meta will showcase your website details on social media.
Logo & Site Title
To modify your website's logo, navigate to "General settings > Site Identity."
- Site Logo: Upload your custom logo for the website.
- White Site Logo: Upload a white version of your logo for the website.
- Favicon: Upload your website's favicon.
- Breadcrumb Image: Upload an image for your website's breadcrumb area.
Site Title Settings:
To alter your website title, go to "General settings > Basic Identity."
- Site Title: Enter your website title; this is crucial for your website's SEO.
- Site Tag Line: Provide a tag line for your website.
- Footer Copyright: Specify the footer copyright text; {copy} will be replaced by ©, and {year} will be replaced by the current year.
- Dark Mode for Admin Dashboard: Enable or disable the dark mode for the admin panel.
- Language Select Show/Hide: Choose to show or hide the language dropdown on your website.
- Enable/Disable Payment Gateway: Enable or disable website payment gateways.
- Disable User Email Verify: Enable or disable user email verification.
- Site Main Color Settings: Adjust the main color of your website.
- Site Base Color Two Settings: Modify the second base color of your website.
- Site Secondary Color: Change the secondary color of your website.
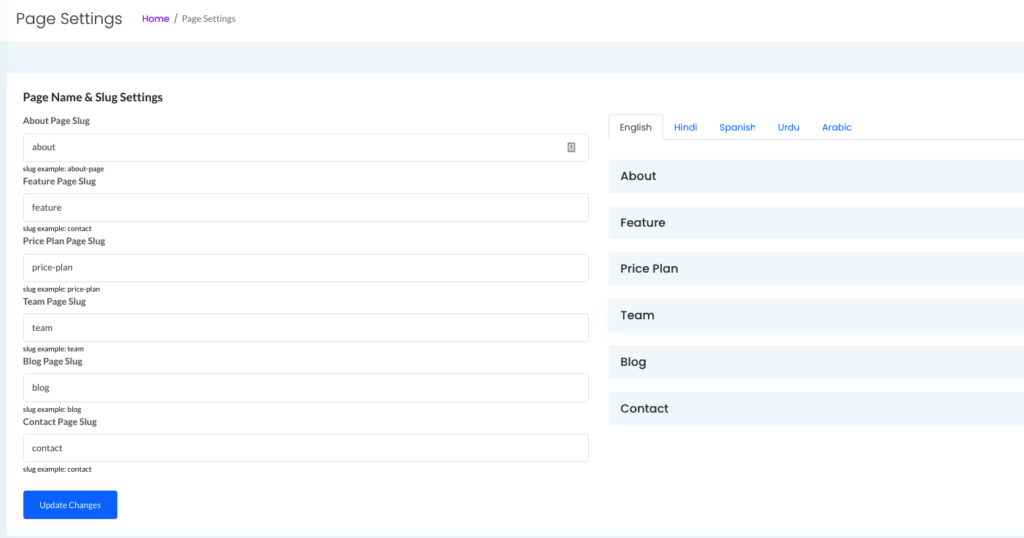
Page Settings
You have the capability to configure page titles, slugs, and section titles, along with meta details that are beneficial for your website's SEO. To modify the page slug and title, proceed to "General settings > Page Settings." It is essential to provide data for all languages if you wish to enable multilingual functionality.
Custom CSS
bstarShop provides you with the option to incorporate your own CSS code, allowing you to modify or customize various elements on the website. Navigate to "General settings > Custom CSS," where you can input your CSS code. Upon visiting your website, you will observe the changes reflecting as per your custom CSS.
Note: If you encounter instances where changes do not appear, clear your browser cache using the following keyboard shortcuts: Ctrl+Shift+R (Windows) or Cmd+Shift+R (macOS).
Custom JavaScript
bstarShop provides you with the option to integrate your own JavaScript code, enabling you to modify or customize various elements on the website. Navigate to "General settings > Custom JS," where you can input your JavaScript code. Upon visiting your website, you will observe the changes reflecting as per your JavaScript code.
Note: In case changes do not appear, clear your browser cache using the following keyboard shortcuts: Ctrl+Shift+R (Windows) or Cmd+Shift+R (macOS).
Cache Settings
There are instances when clearing your system cache becomes necessary. bstarShop offers an option to do so directly from the admin panel. Simply navigate to "General Settings > Cache Settings."
Cache Settings:
- Clear View Cache: This action will clear all cached views.
- Clear Route Cache: This action will clear all route caches.
- Clear Configure Cache: This action will clear all configuration caches.
- Clear Cache: This action will comprehensively clear all types of caches.
Live Chat Integration
bstarShop offers the option to incorporate live chat functionality via Tawk.to. To use this feature, follow the steps below to configure your Tawk.to account and integrate it into your bstarShop:
Step 01: Go to Tawk.to and click on the "Sign Up Free" button to create a new account.
Step 02: Complete the account creation process to establish a completely free account.
Step 03: Select your preferred language and click "Next."
Step 04: Enter your property details, providing information about your website title, URL, and widget name.
Step 05: Add Team Members, inviting coworkers and setting their access levels. An Admin can configure and customize settings, while an Agent can only answer chats and tickets.
Step 06: Install the widget as per Tawk.to instructions.
Step 07: Copy the marked embed code and navigate to the website admin panel in "General Settings > Third Party Scripts." Paste the copied embed code into the "Tawk.to API Widget Code" field.
By following these steps, you can successfully integrate Tawk.to's live chat into your bstarShop.
Typography Settings
bstarShop provides the option to utilize Google Fonts of your choice, offering a selection of over 500+ fonts. To implement your chosen fonts, navigate to "General Settings > Typography Settings."
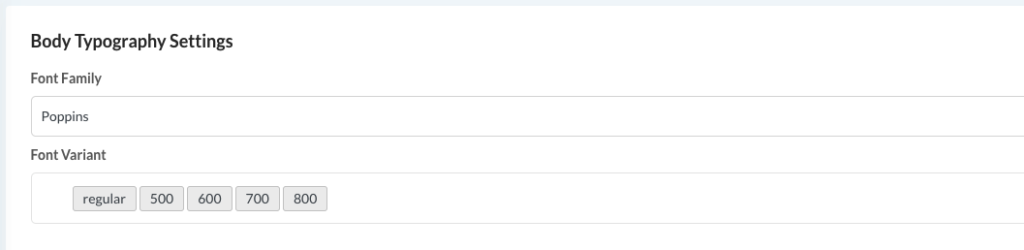
Setting up Body Fonts:
The body font is applied to all paragraphs and inline elements on the website. When selecting a font family, it's essential to also set the font variant for the chosen family to ensure proper functionality. Without specifying the font variant, changes to the font may not take effect.
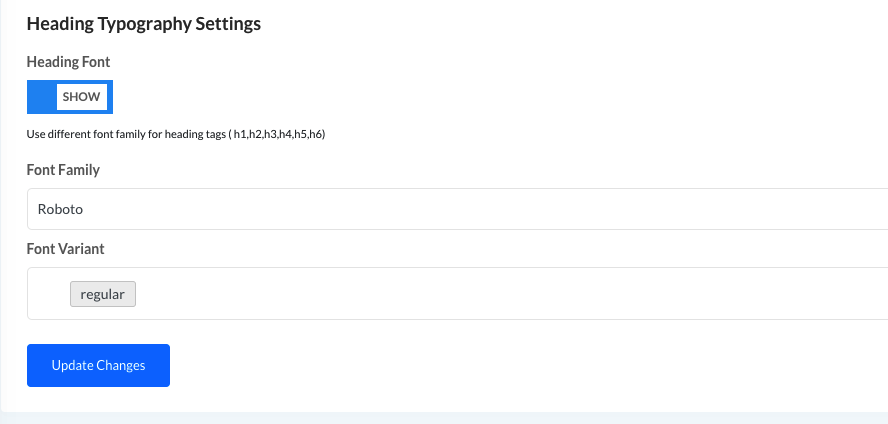
Setting up Heading Fonts:
You can opt for a distinct font family for heading tags (e.g., h1-h6), or you can maintain the same font for both the body and headings by disabling heading fonts.
By configuring these typography settings, you can personalize the fonts used throughout your bstarShop.