Client Management
Clients Overview
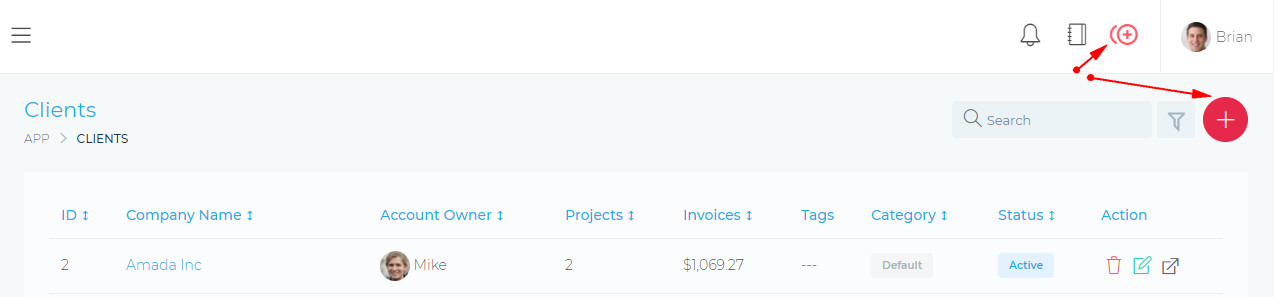
Managing your clients is very easy and intuitive. The place to start is the Client List Page.
You access this page via the main menu:
#:: Main Menu > Customers > Clients

From this page, you are able to view and do the following:
- (1) Create a new client account
- (2) Edit an existing client account
- (3) Delete a client account
- (4) Filter clients, using a detailed filter panel.
- (5) Search your projects, using the free text search box.
- See the most important summary information about your clients:
- The client’s ID
- The client’s company name
- The main contact/account owner for the client account
- The number of projects the client has
- The total value of invoices raised with the client
- Tags, which are useful for quickly identifying key attributes about your client
- Client category, which is helpful for classifying your clients (e.g. Design Clients, SEO Clients, etc)
Create, Edit & Delete Client Accounts
bstarCRM allows you to easily manage your clients/customers. You are able to create new client accounts, which will have their own access to a client dashboard.
Your text is mostly clear, but there are a few minor improvements you can make for better clarity and consistency. Here's a revised version:
Create a Client Account:
You can create a new client account by clicking on the Quick Add icon or the action_column.
Required/Mandatory Information:
- Company Name
- If your client does not have a company, you can use their name as the "company" name.
- First Name
- Last Name
- Email Address
Optional Information:
- Billing Address
- Shipping Address
- Other Details
- Tags: Tags can be used for various reasons, such as identifying unique aspects of your clients.
Editing a Client Account:
To edit a client account, click on the Edit Client Icon, as shown in the image below:

Deleting a Client Account:
To delete a client account, click on the Delete Client Icon, as shown in the image below:

When you delete a client, all items/resources linked to that client will also be deleted. The list below highlights some of the items that will be deleted:
- Projects
- Client Users
- Invoices
- Tasks
- Files
- Payments
- Etc.
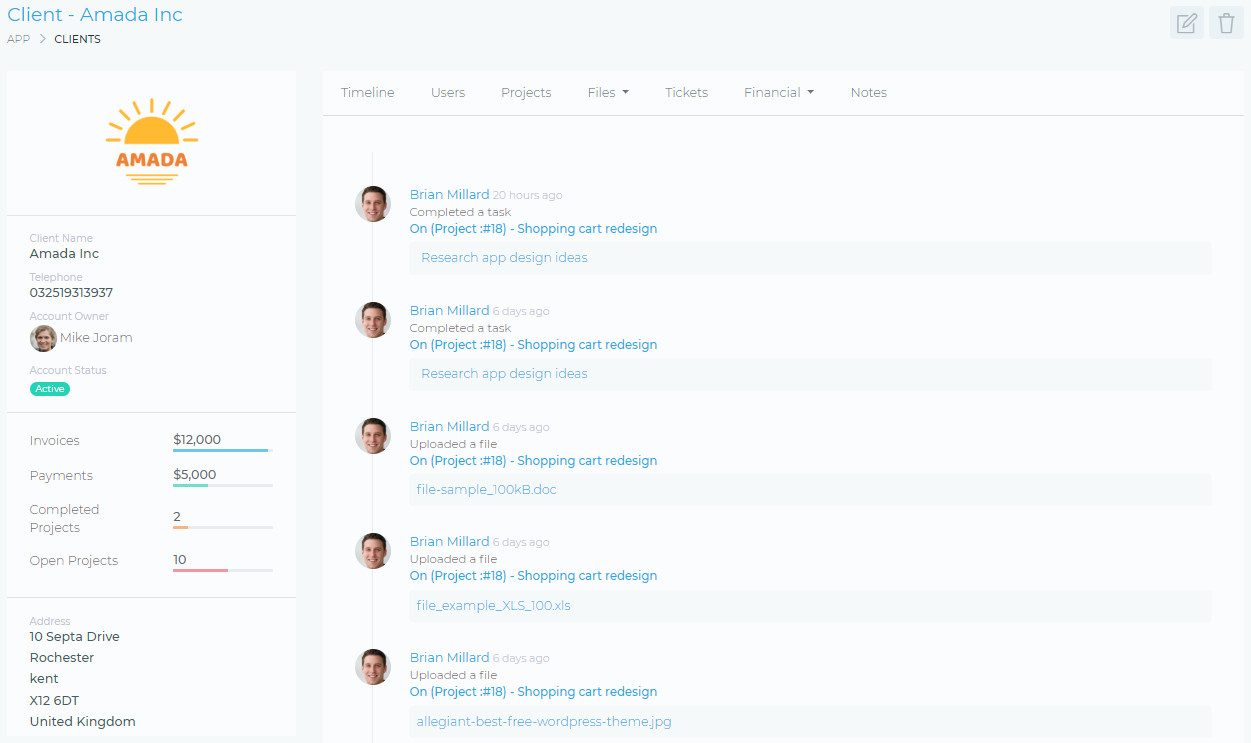
Client Management
The Client Account section of the dashboard gives you easy access to all the resources linked to a client. From this section, you have access to view and manage items such as:
- Event Timeline – This shows you a historic summary of all the activity around a client account.
- Users – You are able to manage all the users associated with a client account. Including creating, editing, and deleting users.
- Project – You are able to manage all the projects that belong to a client. Including, creating, editing, and deleting projects.
- Files – This section allows you to view all files attached to all the client’s projects. You are also able to attach files for the client as a whole. These files are not visible to the client.
- Support Tickets – This section lists all the tickets that are associated with the client. You are also able to easily manage the support tickets from this section. Including, creating, editing, and deleting support tickets.
- Financial – This section includes all the client’s financial resources, such as:
- Invoices
- Estimates
- Expenses
- Timesheets
- Notes – You can create notes relating to your client. These notes are not visible to the client. They are visible to the rest of your team.
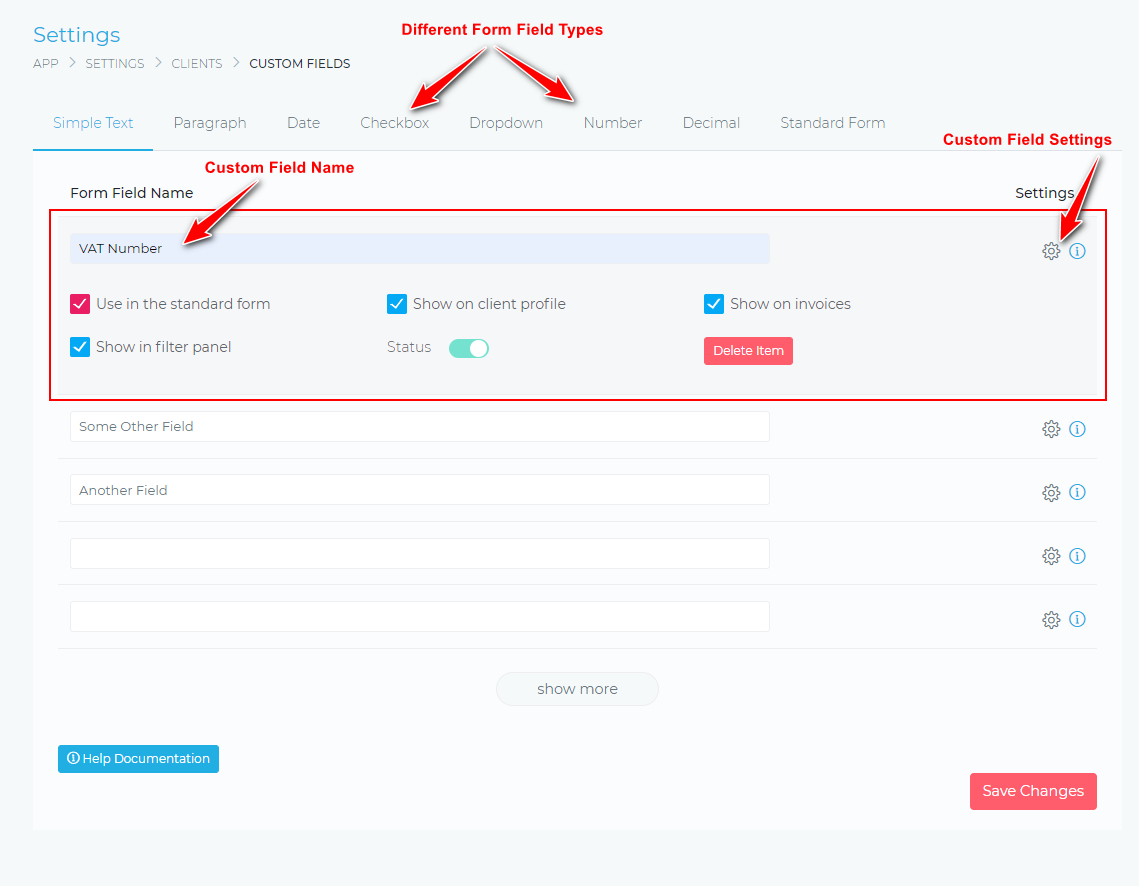
Custom fields allow you to extend the data that you can collect about your clients. This data will be in addition to the standard form fields that are available when you add/create a new client.
To get started, go to:
App > Setttings > Clients > Custom Fields
You will be able to create different types of form fields
- Simple Text
- Paragraph (Long Text)
- Number
- Drop Down List
- Check Box
- Decimal
- Date
You will also be able to tweak some settings about your form field, such as
- Use in the standard form – This means the field will be displayed in the “Add New Client” form
- Show on client profile – This means the data will be displayed on the client profile page
- Show on invoices (and estimates) – This will display the data on invoices and estimate
- Show in filter panel – This will make the field available when you are searching and filtering your clients
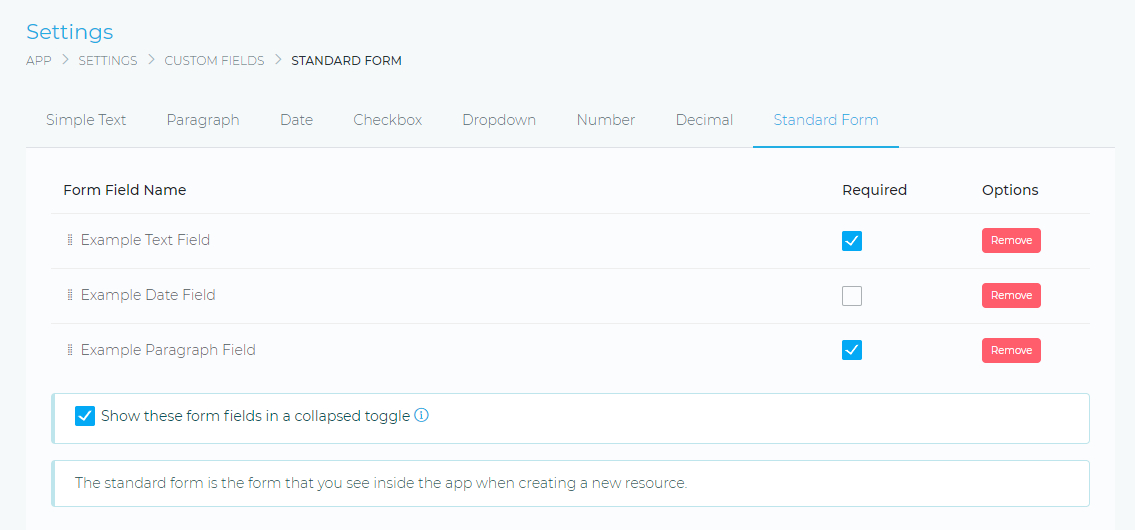
Form Options
You can further tweak how the form fields will be displayed in the “Add New Client” form. To do this, click on the Standard Form menu item (as shown below)
You will be able to do the following:
- Reorder the form fields (drag & drop)
- Specify if the form field is mandatory (required)
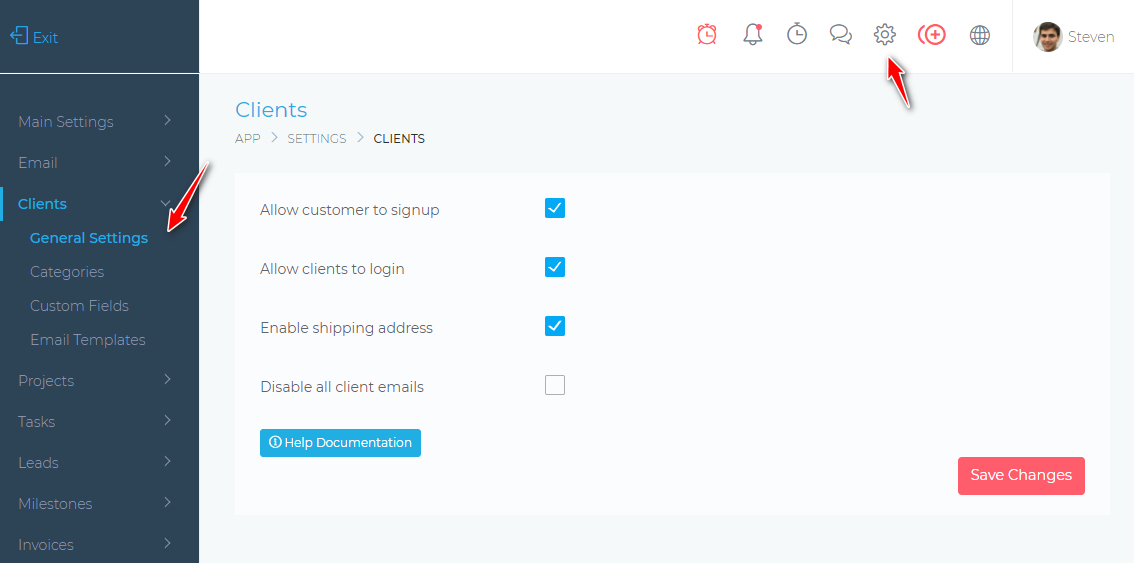
Client Settings
The client settings page allows you to set the following:
- Allow Customer To Signup – If this is enabled, anyone will be able to register as a new client. Registration is done via the login page.
- Allow clients to login – If you disable this option, your clients will not have access to the CRM.
- Enable Shipping Address – Enable this if you want to collect and record your customer’s shipping addresses. Note that billing addresses are enabled by default.
- Disable all client email – If you disable this option, the CRM will not send any emails or notifications, to all your clients.