
Estimates
Overview
Clients are reluctant to commission a project when the cost is unknown. This is where cost estimates can help you generate more work. Estimates help the client to understand what sort of budget is required for the work that they want to be undertaken.
bstarCRM enables you to create estimates, which you can use to better convert your leads into customers.
The best place to start is the Estimates page.

#From this page, you are able to view and do the following:
- (1) Create a new estimate
- (2) Filter estimates, using a detailed filter panel. You can filter estimates by dates, categories, statuses, etc.
- (3) Toggle (hide/show) the Quick Stats panels
- (4) Search your estimates, using the free text search box.
- (5) Delete an estimate
- (6) Edit an estimate
- (7) View an estimate
- (8) Additional estimate management settings, via the quick actions button.
Creating Estimates
bstarCRM allows you to easily manage your estimates. The next sections will explain how to create and manage your estimates.
Creating An Estimate
You can create a new estimate by clicking on the (1) Quick Add Icon or by clicking on the (2) Add Estimate Button.

Editing Estimates
Once you have created an estimate, you will now want to edit it. The section below will show you how to go about doing it.

- (1) Edit Estimate
- To edit an estimate, start by clicking the edit estimate button. This will change the estimate from viewing mode to editing mode (as shown in the image above).
- (2) Publish Estimate
- When you create an estimate, its status is set to Draft. A draft estimate is not viewable by the client. Once you have finished editing your estimate, you can publish it. When an estimate is published, an email is automatically sent to the customer, with the estimate attached. The estimate then becomes viewable by the client
- (3) Email Estimate
- You can use this feature to resend the estimate to the customer. It will be the same email as the one sent when you publish the estimate.
- (4) Download Estimate
- This button allows you to download the estimate in PDF format.
- (5) Delete Estimate
- (6) Set Estimate Dates
- This option allows you to set estimate dates.
- (7) Add New Blank Line
- This will create a new blank line, for you to price/bill.
- (8) Add New Time Line
- Use this feature is you are specifically billing for time (i.e. hours/minutes).
- (9) Product Item
- To save you time, you can create a database of items that you commonly bill your clients. You can then use this button to quickly select an item to add to an estimate.
- (10) Terms & Conditions
- Default terms and conditions can be changed via the dashboard settings section. You can also change them on an estimate by estimate basis.
- (11) Tax Rates
- You various tax rates are created via the dashboard settings section. These tax rates are then available for applying in estimates. You can apply more that one tax.
- (12) Discounts
- You can apply a fixed or percentage-based discount.
- (13) Save Estimate
- (14) Estimate Notes
- You can save notes which are not visible to the client.
Change/Reset Estimate Numbers
Estimate numbers are auto-incremental. The CRM increases the invoice ID by one digit, every time a new invoice is created.
You can manually change the next estimate ID via the steps shown below.
The number that you specify is what will be used to create the next estimate ID.
In the event that you want to reset or start over from invoice ID: 0001, you must first delete all estimates in the CRM and then change the number shown in the steps below, to 1.

Estimate Statuses
When you create a new estimate, it is given a status of “Draft”. This status means that the estimate has not been yet been emailed to your client and it is not visible in the client’s CRM dashboard.
Once you are ready to send the estimate to the client, you must “Publish” it, using the button shown below.
On publishing the estimate, an email is automatically sent to the client (with the pdf estimate attached). ‘
The estimate will also become visible to the client, in their CRM dashboard.

Once an invoice has been published, its status will automatically change to “New” status.
Changing Estimates Statuses
The system automatically determines the correct status to give an estimate, based on the actions taken by the client (i.e. Accepted or Declined).
You can also change the status manually, as shown in the image below.

Currency Settings
From this settings page, you will be able to set your application’s currency settings.
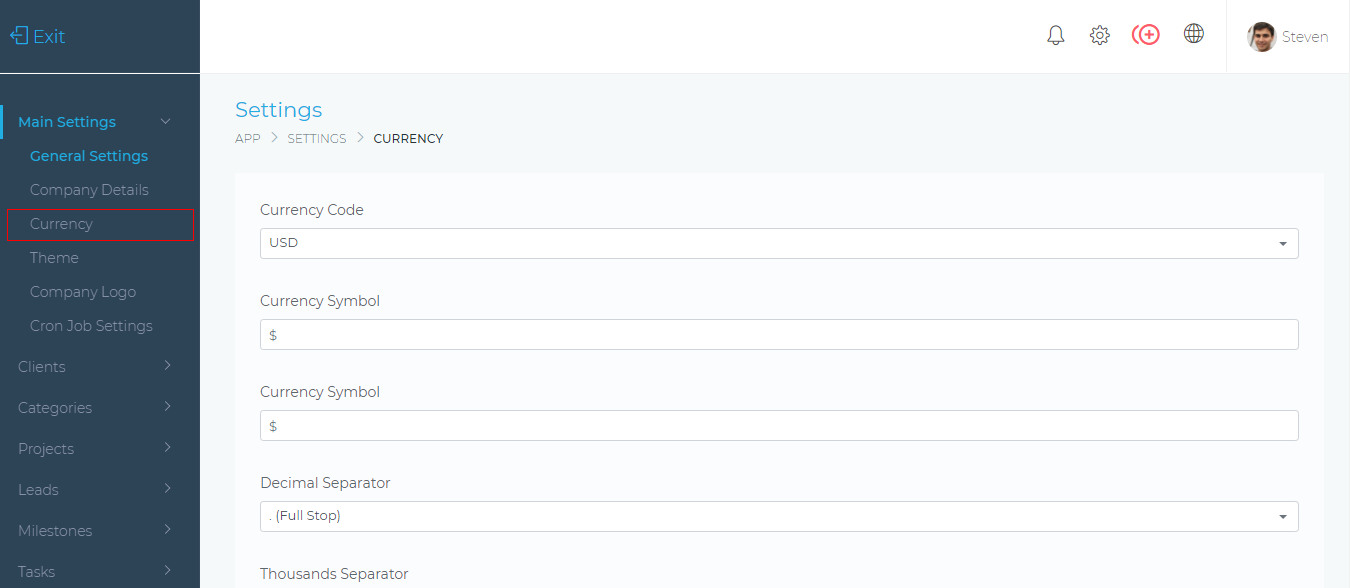
Currency Code
This is your currency’s ISO code. You can select it from the dropdown list.
Currency Symbol
This is the currency that will be used for all billing in the application (e.g. Invoices, Estimates, etc).
Decimal Separator
This sets the symbol (common, full stop, etc) that is used for the decimal point when displaying numbers (e.g. 10.00).
Thousands Separator
This sets the symbol (common, full stop, etc) that is used when displaying money values (e.g. 1,000.00).
Currency Symbol Position
This sets the positioning of the current symbol. (e.g. $100.00 or 100.00$).
Estimate Settings
The estimate settings page allows you to change various aspects of how the Dashboard handles estimates. Below are the various settings and their explanations.

On this page you will be able to apply the following settings:
- Estimate Prefix. This is any text you want to be prefixed to the invoice number.
- Example EST- will create invoices as follows: EST-000276
- Terms and conditions – The default terms and conditions that are displayed on an estimate. These terms can also be changed when creating or editing an estimate.