Task Management
Milestones
bstarCRM enables to work efficiently, by breaking down your projects into Milestones & Tasks.
Project Milestones are points along the progress path of your project. Milestones do not have target dates, but rather they focus on specific progress points that must be achieved for a project to be successful.

As the administrator, you can control how project milestones are used inside the dashboard. You do this via the dashboard settings panel
- Create default milestones, which will be applied whenever a new project is created
- Enable/Disable the team member’s ability to:
- (1) Create Milestones
- (2) Delete Milestones
- (3) Edit Milestones
When a milestone is deleted, there is an option to delete all its tasks, or the tasks will automatically be moved into the uncategorized milestone.
Tasks
Project Tasks allow you to structure your project work, by splitting the wok into smaller pieces that you aim to finish by a set deadline. Your team members can work on tasks individually, or for more complex tasks, they can collaborate.
bstarCRM also allows your team to track the amount of time that they are spending on a task, which can then be the basis for billing your clients.

Using the main actions panel (as shown above) you are able to do the following:
-
(1) (2) Create a new task.
-
(3) Filter tasks.
-
(4) Sort tasks (e.g. sort by due date).
-
(5) Toggle between list view and kanban board view.
-
(6) View quick task statistics, (e.g. open tasks, completed tasks, etc).
-
(7) The admin user can select to either view only the tasks that they are assigned to or to view all tasks
-
(8) The free text search box, allows you to quickly find specific tasks.
kanban View
The dashboard allows you to view tasks as a list or as cards on a kanban board. You can easily change between these two viewing modes at any time. The dashboard also remembers your viewing preferences, so you do not need to keep changing every time.
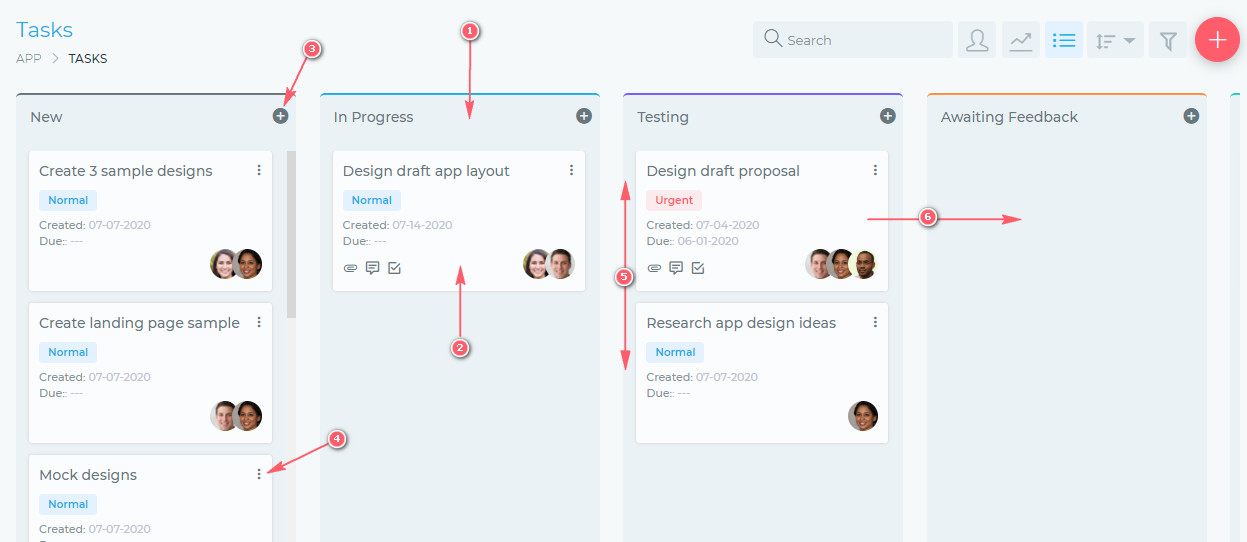
The kanban view has the following features:
- (1) Kanban Board
- The kanban board is a workspace that denotes a task’s progress. As you make progress on a task, you can drag it from one board to another. Finally, the tasks will end up on the completed board.
- (2) Task Cards
- Each task is represented by a card. The face of this card has some basic/summary information about the card. To work on the task, simply click the card and you will get a full view of the card/task.
- (3) Add New Task Button.
- (4) Quick editing button.
- (5) You can change the position of a task by simply dragging it up or down.
- (6) As work progresses on the task, you can move it from one board to the next, by simply dragging and dropping it.
List View
You can also view tasks in a simple table format, as shown below.
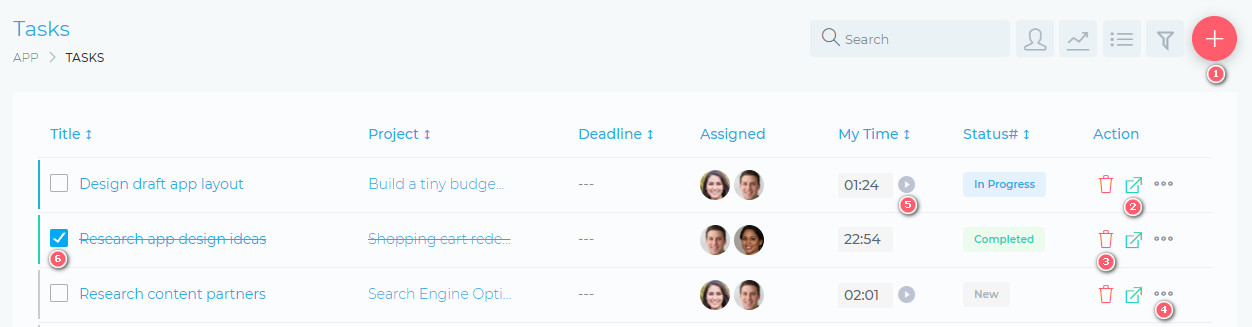
From the table list view, you are able to do the following:
- (1) Create a new task.
- (2) Open a task.
- (3) Delete a task.
- (4) Edit a task.
- (5) Start & stop a task timer.
- You can only do this for tasks that you are assigned to.
- (6) Complete a task.
Most of the actions on a task can only be carried out by users assigned to the task or the project manager.
Working On A Task
When you open a task, you are presented with a view as shown below:
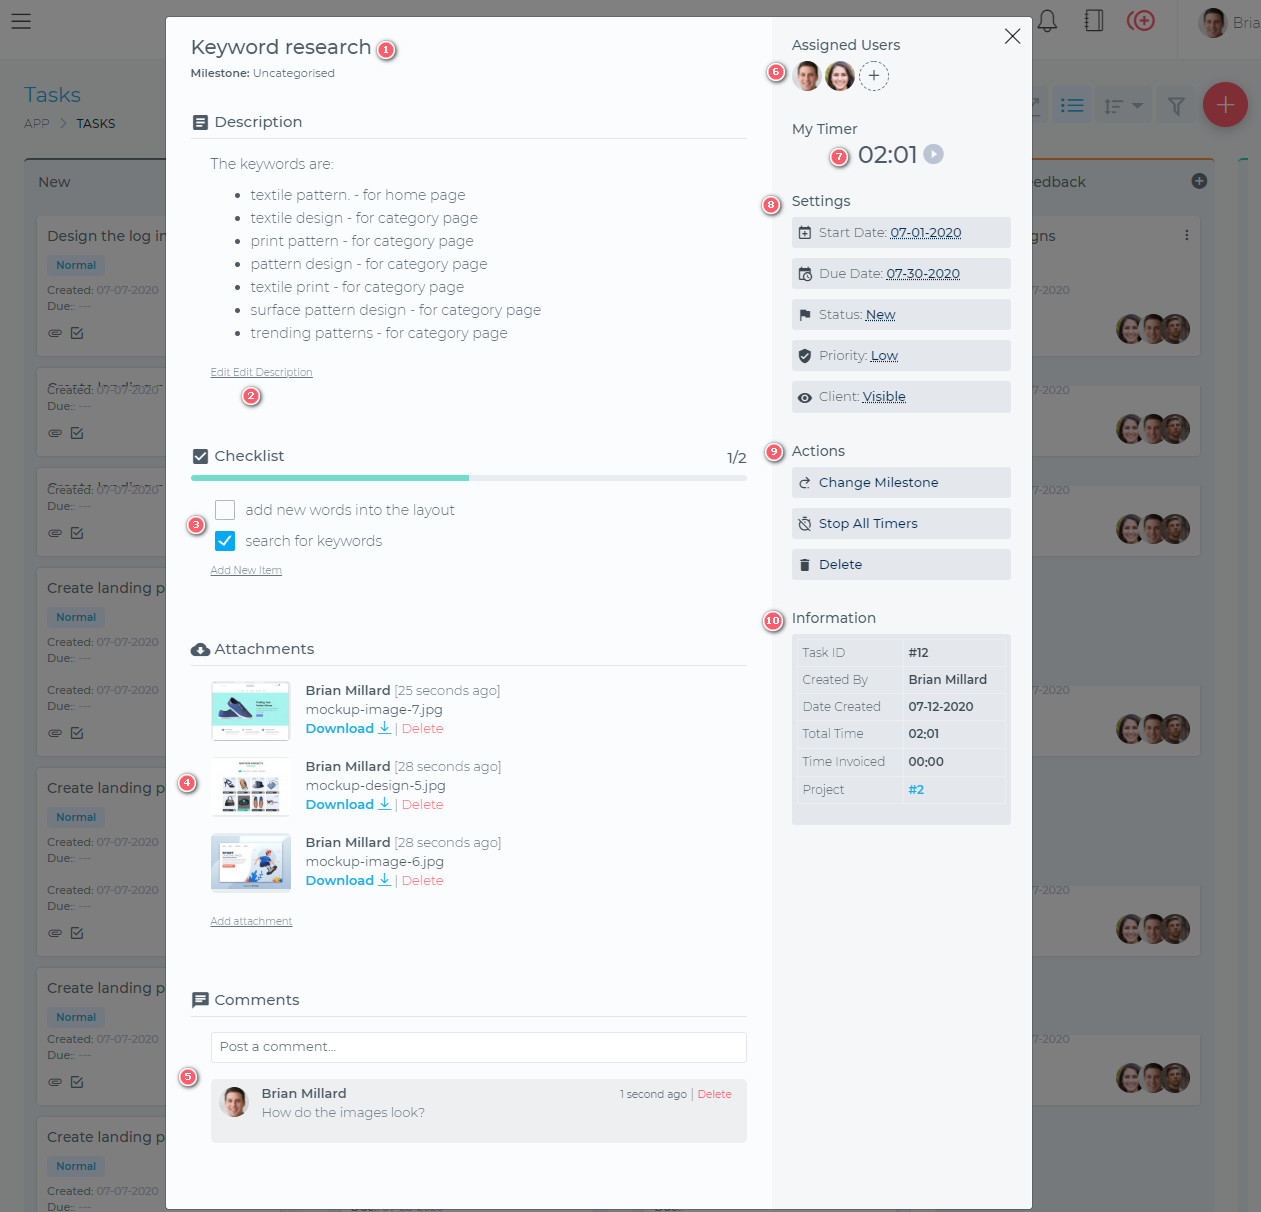
bstarCRM makes working on your tasks very easy and intuitive. You are presented with a clean, user-friendly working space, where you are able to do the following:
- (1) Edit the task title
- (2) Edit the task description
- (3) Create and complete checklists
- (4) Attach files to the task
- (5) Comment and collaborate with team members (and when enabled, your client too)
- (6) Assign different team members to a task
- (7) Track your time using the task timer
- (8) Update various task settings, including setting the appropriate priority for the task
- (9) Update various other task settings
- (10) A summary view of key task details/attributes
Time Tracking
The time tracking feature of bstarCRM enables you and your team to keep track of the amount of time that you spend working on your projects.
It works by providing you with a timer, which you can start and stop, as you work on project tasks.
Time tracking is a feature that is linked to tasks. You have to create some tasks under your projects, in order for you to track the time you spend working on them.
Getting Started
When you are viewing tasks that you are assigned to, you will notice that they will have a timer icon, as shown below (1).
![]()
The image above is illustrating the following:
- (1) You are assigned to this task, but the timer is currently not running. When you start working on this task, you can click the start/play icon, and the timer will start recording.
- (2) This is a task that has been marked as completed. The timer can no longer be started on this task.
- (3) This is a task that you are currently working on and the timer is running. You can stop this timer by simply clicking the stop icon.
You are also able to start and stop a timer from inside the task window, as shown below.
![]()
Time Sheets
Timesheets are a record of all the time that you have spent working on project tasks.
To view your timesheets, you click on your profile avatar and select My Timesheets.
For the admin user, you are also able to view all users timesheets (App > Other > Timesheets)
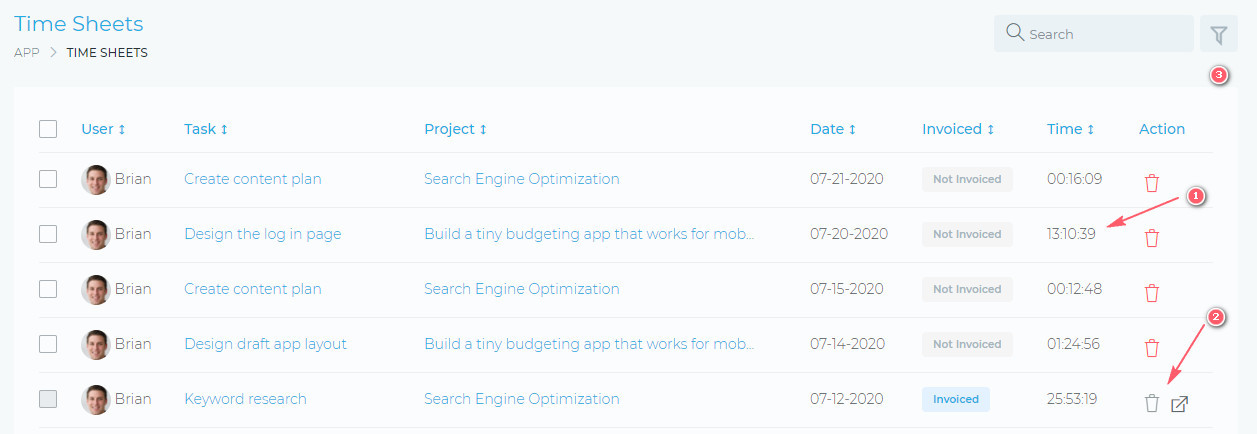
The image above illustrates the following:
- (1) A record of time spent on a task, on a given date. The time has not been invoiced to the customer. You are able to delete this time record.
- (2) A record of time spent on a task, which has since been invoiced to the customer. You are not able to delete this timer. You can however view the invoice that it was billed to. If the invoice is deleted, you will then be able to delete this time record or to bill it to another invoice.
- (3) The filter feature helps you to find specific time records. You are also able to group time records, per task or per user, for a broader view.
Invoicing Time Spent
You are able to bill time records from the invoice page.
Custom Fields
Custom fields allow you to extend the data that you can collect about your tasks. This data will be in addition to the standard form fields that are available when you add/create a new task.
To get started, go to:
App > Setttings > Tasks > Custom Fields
You will be able to create different types of form fields
- Simple Text
- Paragraph (Long Text)
- Number
- Drop Down List
- Check Box
- Decimal
- Date
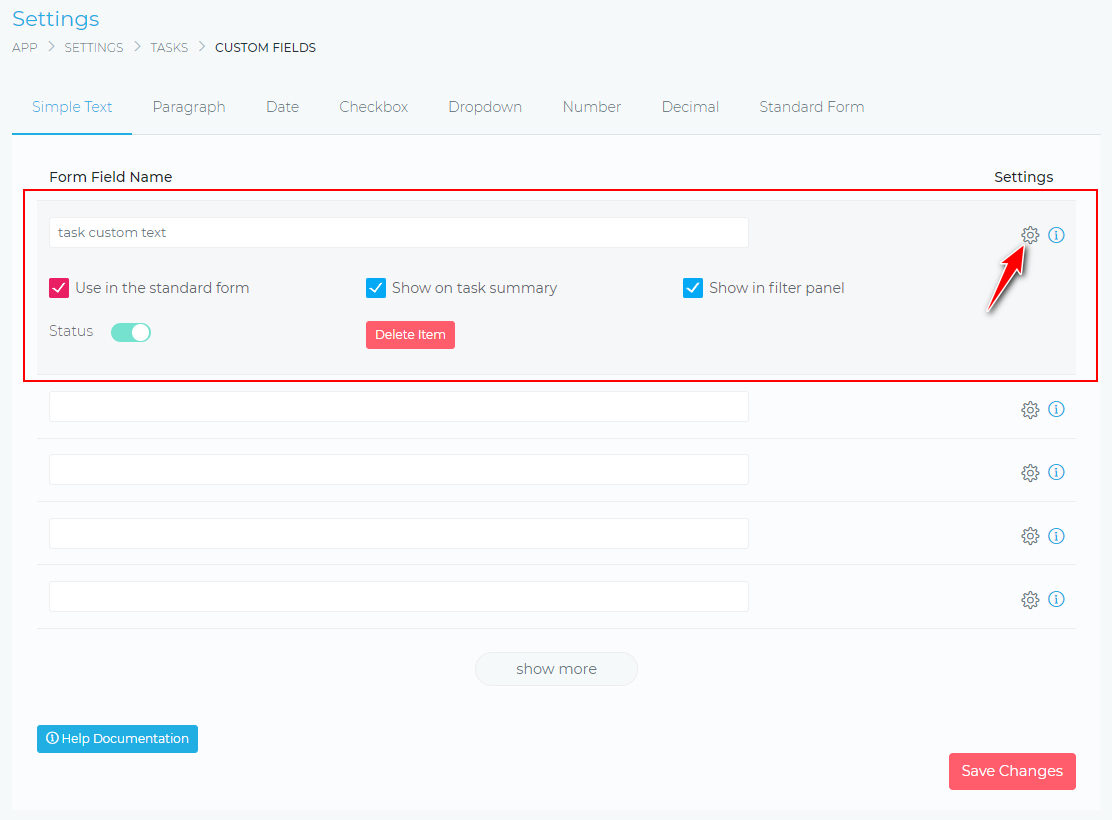
You will also be able to tweak some settings about your form field, such as
- Use in the standard form – This means the field will be displayed in the “Add New Task” form
- Show on project profile – This means the data will be displayed on the task details page
- Show in filter panel – This will make the field available when you are searching and filtering your tasks
Form Options
You can further tweak how the form fields will be displayed in the “Add New Task” form. To do this, click on the Standard Form menu item (as shown below)
You will be able to do the following:
- Reorder the form fields (drag & drop)
- Specify if the form field is mandatory (required)

Milestone Settings
From the milestone setting page, you will be able to apply settings for how the application will deal with Milestones.
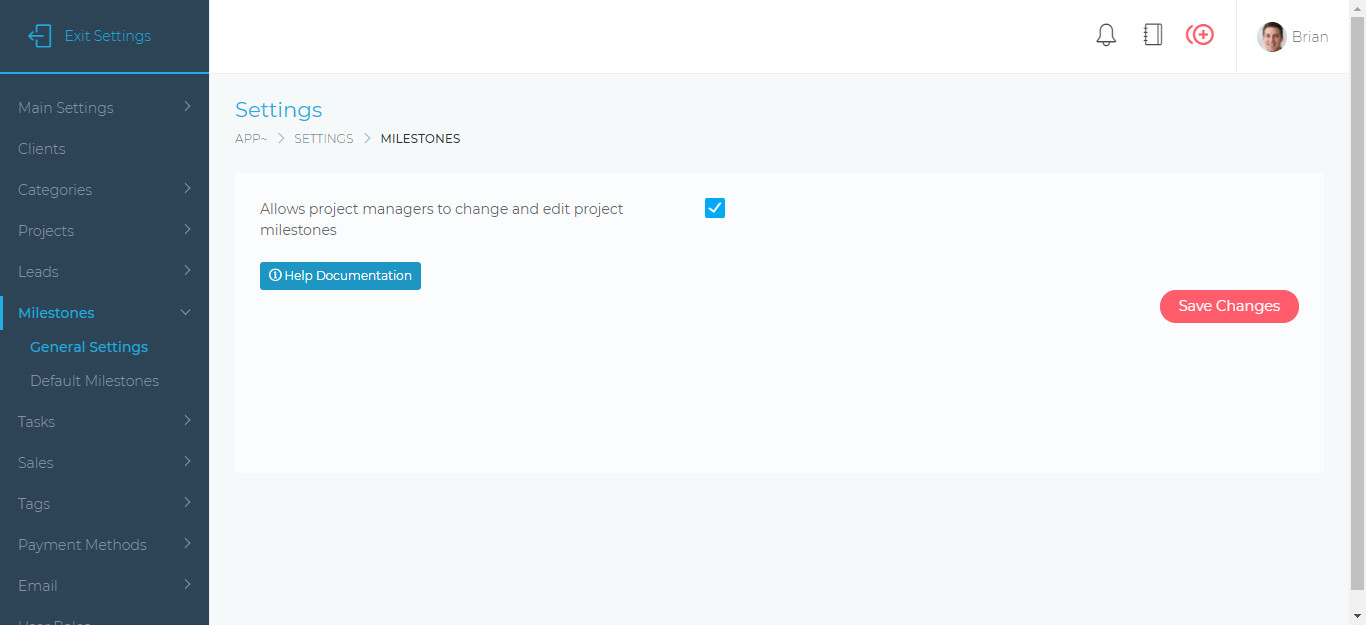
General Settings
This page allows you to specify the following settings:
- Set whether team members can create, edit, delete project milestones.
Default Milestones
From this screen, you are able to create default milestones which will be added whenever a new project is created.
Note: If you have allowed team members to create and edit milestones (in the step above), they will be able to override these default milestones. Changes that team members make, will only apply to that particular project.
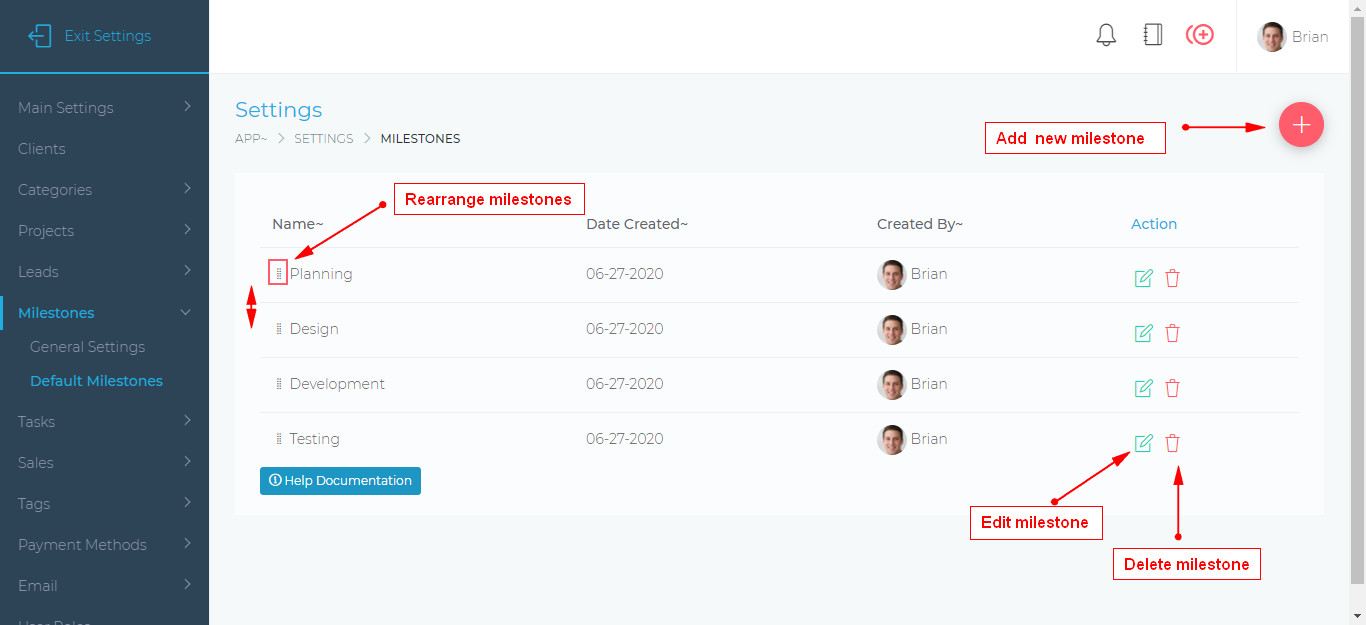
On this screen, you will able to do the following
- Create default milestones.
- Rearrange the position of milestones (as displayed in a project).
- Edit and delete default milestones.
Task Settings
From the task settings page, you will be able to apply settings for how the application will deal with tasks.
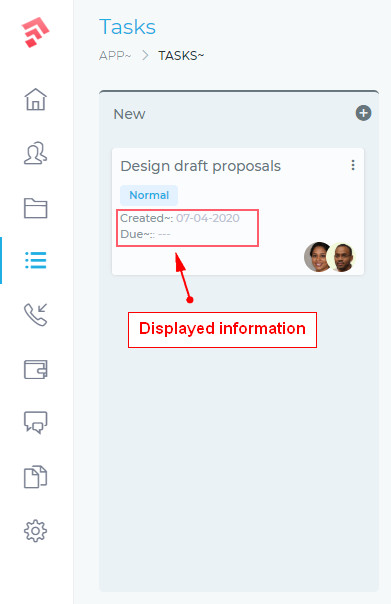
General Settings
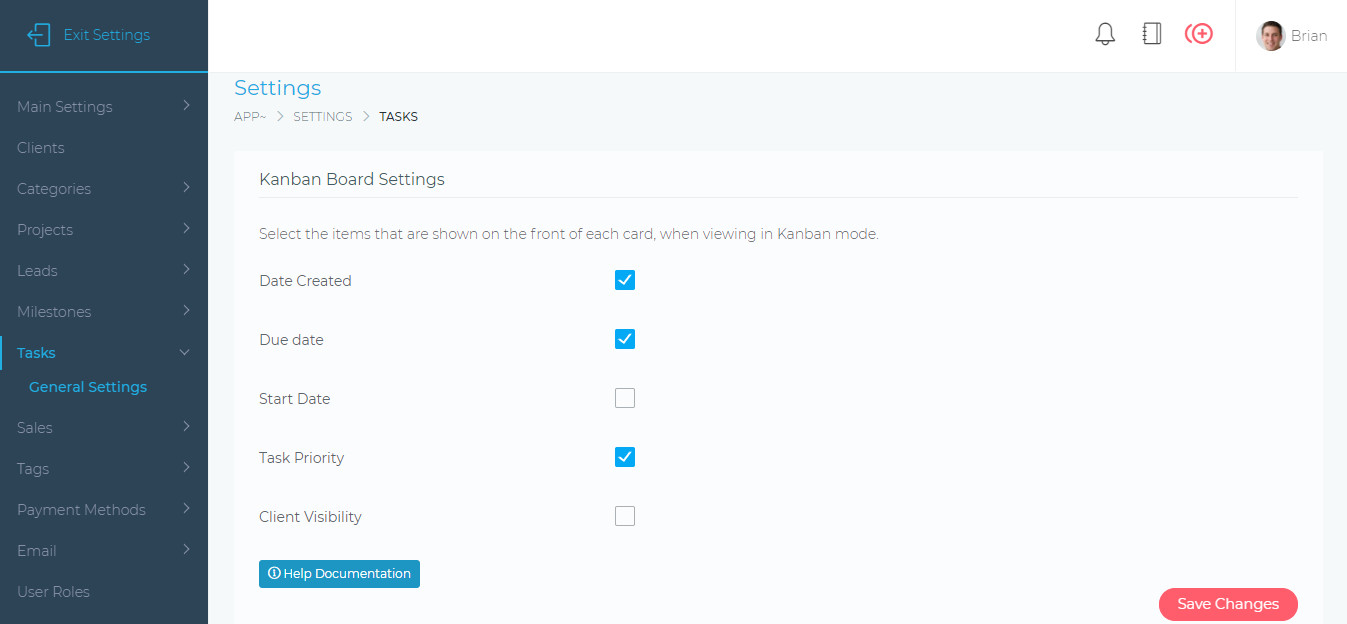
From this page, you can specify what information is displayed on the task card, when viewing in kanban mode. An example is shown below.