
Invoices
Overview
bstarCRM makes getting paid by your clients very easy and efficient. You are able to bill your customers in a variety of ways. From one -time invoices to recurring invoices, we have made the process easy and intuitive.
The place to start is the invoices pages.

#From this page, you are able to view and do the following:
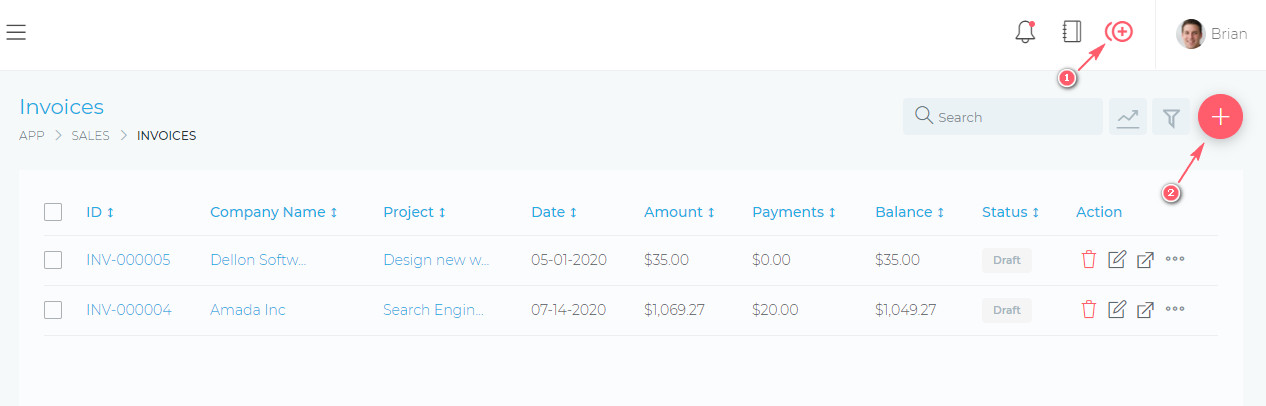
- (1) Create a new invoice
- (2) Filter invoices, using a detailed filter panel. You can filter invoices by dates, categories, statuses, etc.
- (3) Toggle (hide/show) the Quick Stats panels
- (4) Search your invoices, using the free text search box.
- (5) Delete an invoice
- (6) Edit an invoice
- (7) Additional invoice management settings, via the quick actions button.
Creating Invoices
bstarCRM allows you to easily manage your invoices. You are able to create one-time invoices or recurring invoices. The next sections will explain how to create either type of invoice.
Creating An Invoice
You can create a new invoice by clicking on the (1) Quick Add icon or by clicking on the (2) Add Invoice Button.
Publishing An Invoice
Your invoice will remain in “Draft” status, until you publish it. Publishing an invoice will make the invoice visible to your client and will also send an email notification to your client.
To publish an invoice, see the image below.

Recurring Invoices
Recurring invoices allow you to bill your customers automatically, on a regular basis.
To create recurring invoices, you must first create a regular invoice. This will act as the first invoice that your customer will receive and it will also act as a template for all future/automatic invoices.
Once you have created your regular invoice, you can make it recurring as shown below
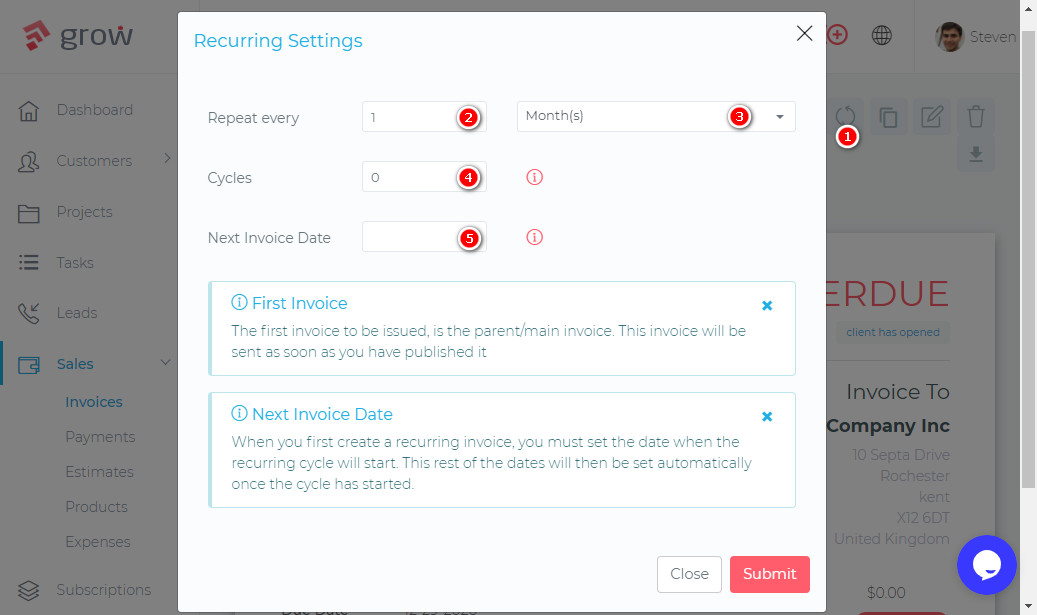
(1) Click on the recurring invoices icon and select Recurring Settings
(2) & (3) Set how often the invoice should recur. If for example, you want the invoice to repeat every month, select 1 & month
(4) The cycle determine how many times the invoice should recur. If you want it to recur indefinitely, set the value to 0
(5) The next invoice date, tells the application when it should start creating the recurring invoices. For example, if your invoice is recurring every month, then this date should be 1 month from the date that you created the initial/regular invoice.
Invoice Products
Invoice products are the various goods/services that your organization provides. You can save all these products, making it easier and faster when creating invoices.
The best place to start is the Products page.
:: Main Menu > Sales > Products
Managing Products
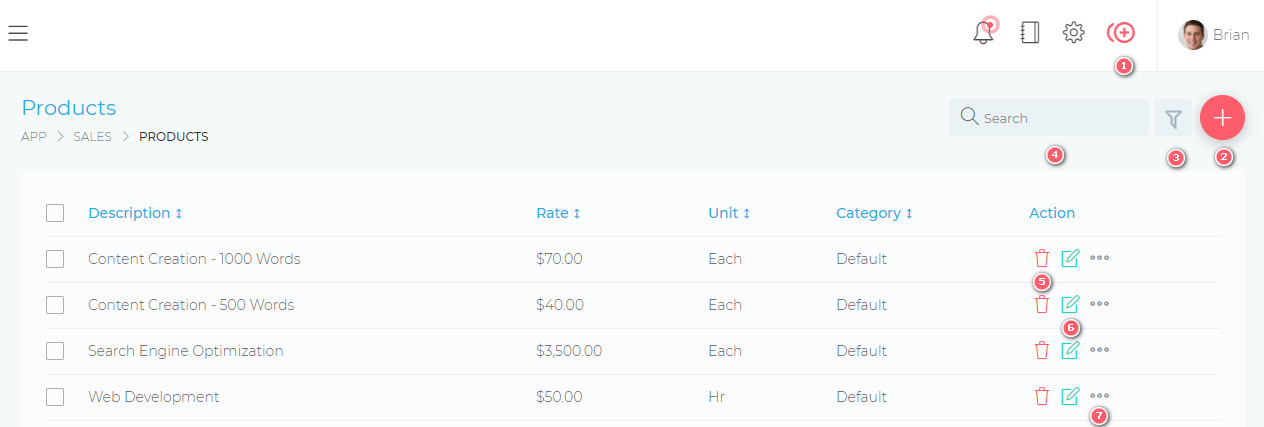
From this page, you are able to view and do the following:
- (1) & (2) Create a new product
- (3) Filter estimates, using a detailed filter panel. You can filter estimates by dates, categories, statuses, etc.
- (4) Search your estimates, using the free text search box.
- (5) Delete an estimate
- (6) Edit an estimate
- (7) View an estimate
- (8) Additional estimate management settings, via the quick actions button.
Creating Products
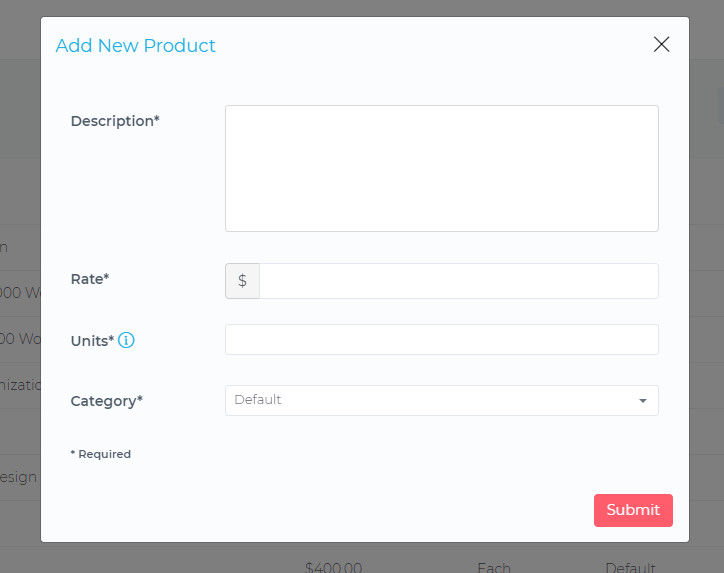
Basic information
- Description
- Rate
- Unit
- e.g. Each, Item, Hrs, etc.
- Category
Additional Information On Invoices & Estimates
There are 2 options available if you need to show some custom information on your invoices and estimates. Below are the instructions to help you get started.
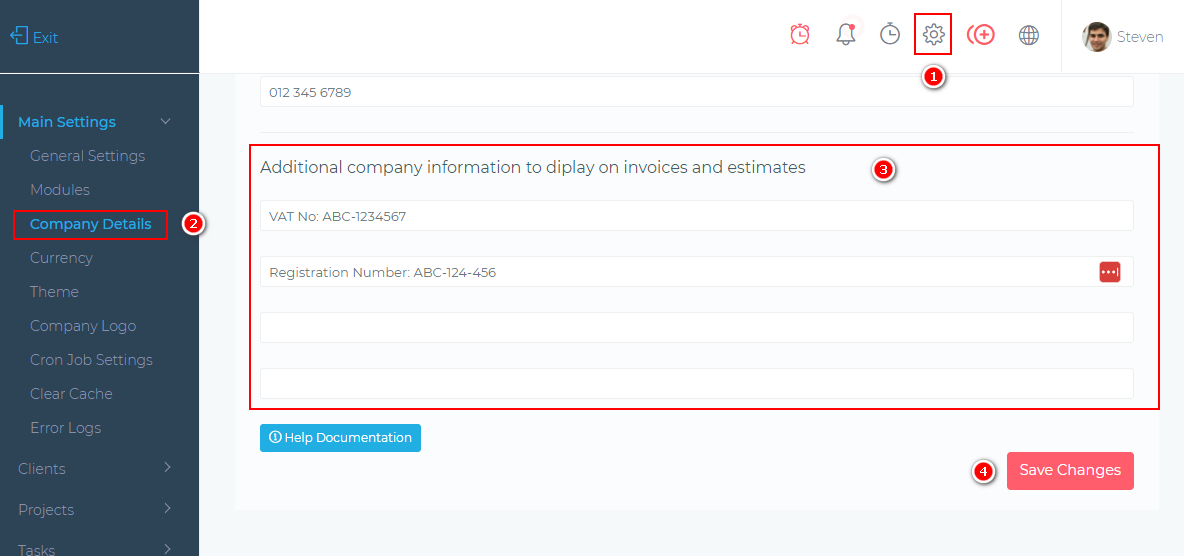
Additional Company Information
You may need to display information about your company (e.g. registration number or Tax number). To do this, follow the steps shown in the image below.
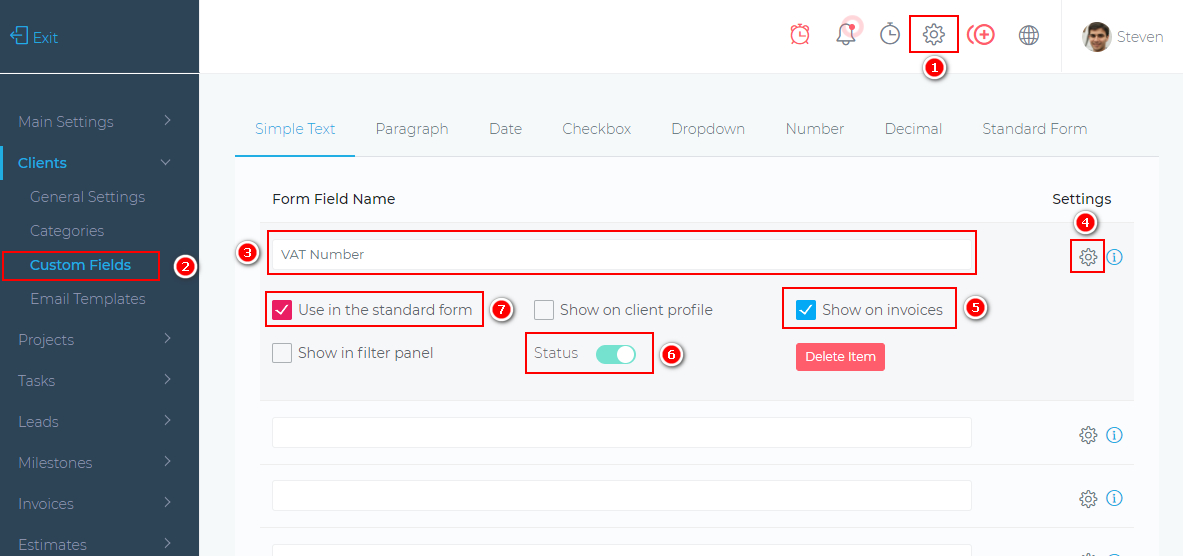
Additional Client Information
You may need to display information about your client(e.g. Tax/VAT number). To do this, follow the steps shown in the image below.
Change/Reset Invoice Numbers
Invoice numbers are auto-incremental. The CRM increases the invoice ID by one digit, every time a new invoice is created.
You can manually change the next invoice ID via the steps shown below.
The number that you specify is what will be used to create the next invoice ID.
In the event that you want to reset or start over from invoice ID: 0001, you must first delete all invoices in the CRM and then change the number shown in the steps below, to 1.

Invoice Statuses
When you create a new invoice, it is given a status of “Draft”. This status means that the invoice has not been yet been emailed to your client and it is not visible in the client’s CRM dashboard.
Once you are ready to send the invoice to the client, you must “Publish” it, using the button shown below.
On publishing the invoice, an email is automatically sent to the client (with the pdf invoice attached). ‘
The invoice will also become visible to the client, in their CRM dashboard.

Once an invoice has been published, its status will automatically change to “Due” or “Overdue”, depending on the due dates of the invoice.
Changing Invoice Statuses
An invoice’s status cannot be changed manually. The system automatically determines the correct status to give an invoice, based on the following conditions
- If there are any outstanding payments on the invoice
- The due dates of the invoice
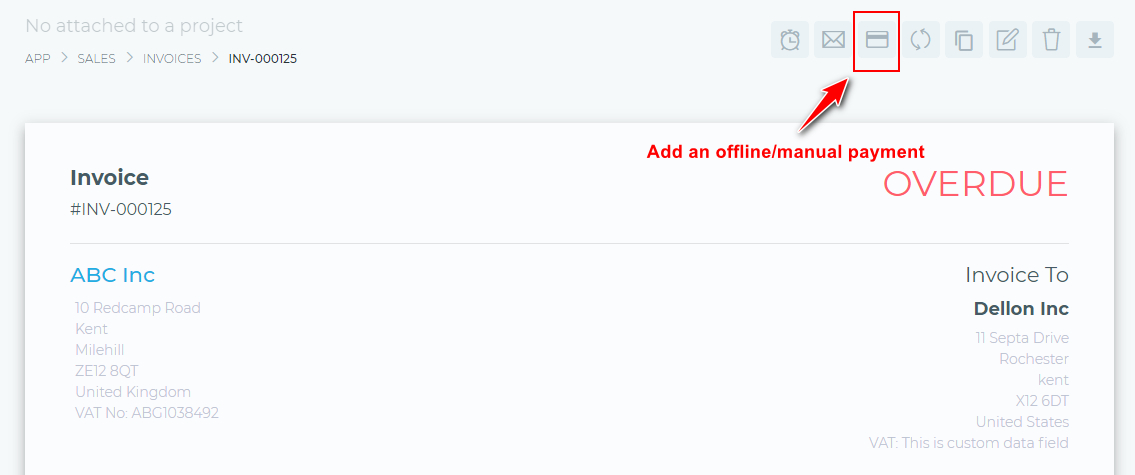
It is therefore not possible to mark an invoice as “Paid” if there is an outstanding amount/balance on the invoice.
To mark an invoice as paid, a payment will need to be applied to the invoice (either a manual/offline payment or an online payment by your client)
To add an offline/manual payment, you can use the button shown below.
Currency Settings
From this settings page, you will be able to set your application’s currency settings.
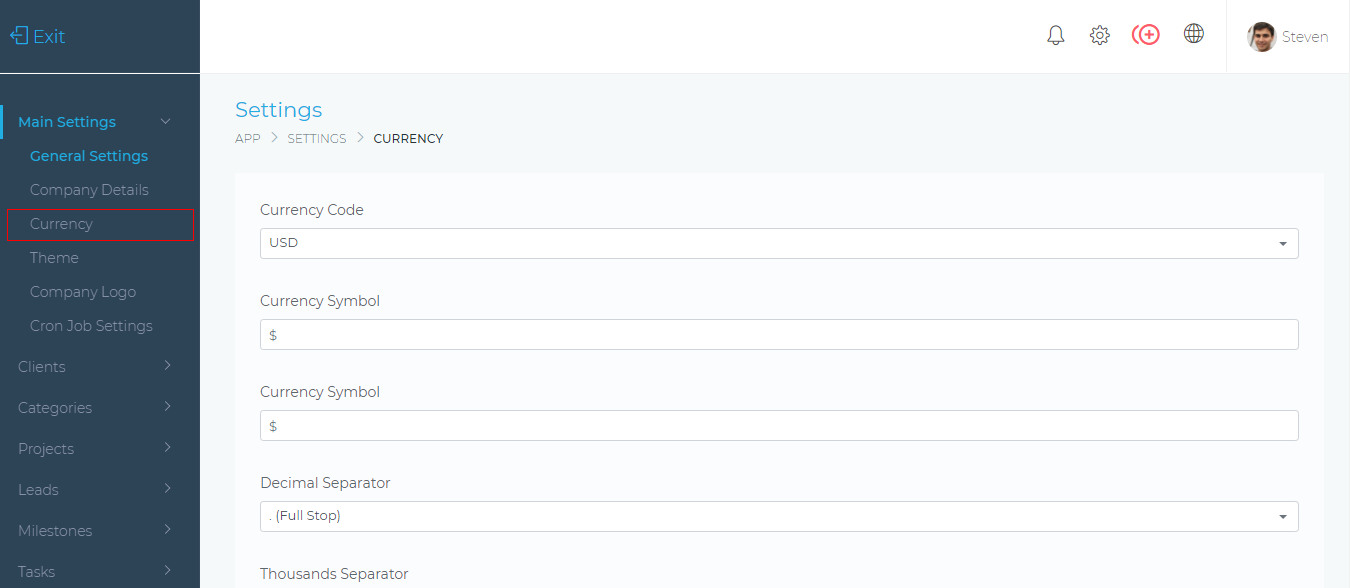
Currency Code
This is your currency’s ISO code. You can select it from the dropdown list.
Currency Symbol
This is the currency that will be used for all billing in the application (e.g. Invoices, Estimates, etc).
Decimal Separator
This sets the symbol (common, full stop, etc) that is used for the decimal point when displaying numbers (e.g. 10.00).
Thousands Separator
This sets the symbol (common, full stop, etc) that is used when displaying money values (e.g. 1,000.00).
Currency Symbol Position
This sets the positioning of the current symbol. (e.g. $100.00 or 100.00$).
Invoice Settings
The invoice settings page allows you to change various aspects of how the Dashboard handles invoices. Below are the various settings and their explanations.
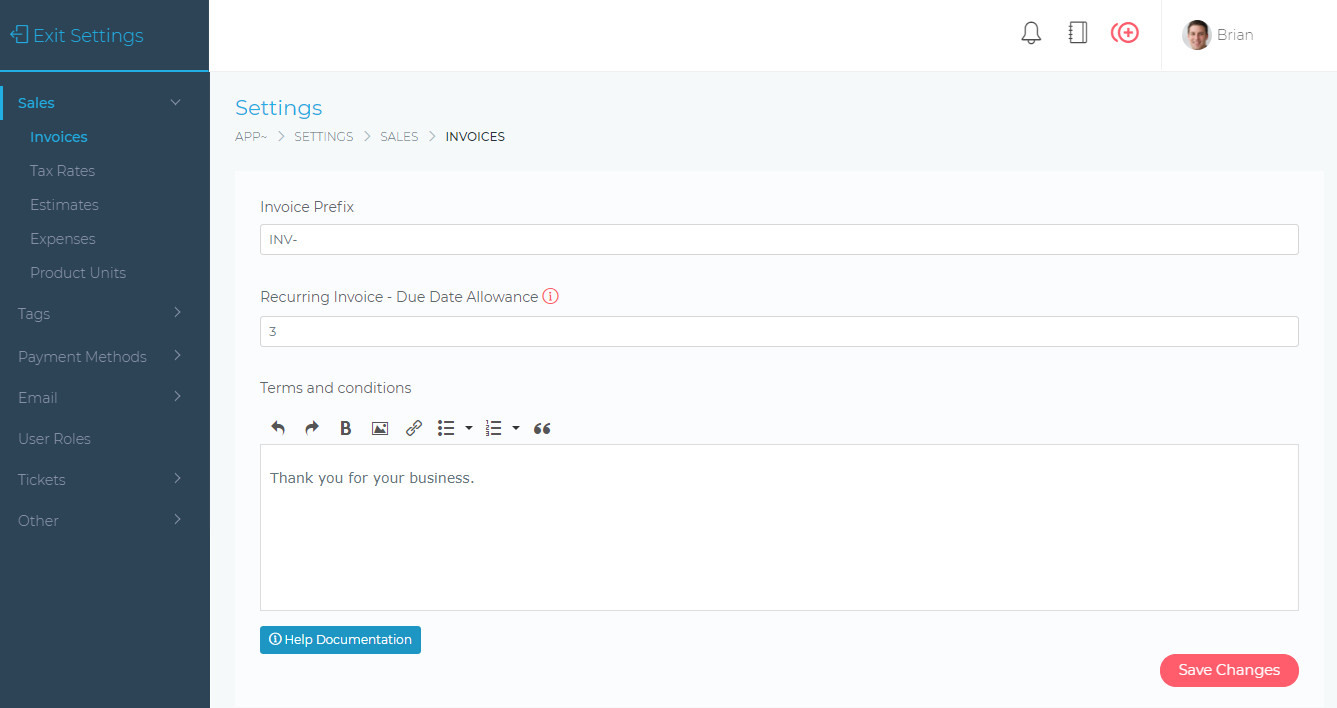
On this page you will be able to apply the following settings:
- Invoice Prefix. This is any text you want to be prefixed to the invoice number.
- Example INV- will create invoices as follows: INV-000276
- Recurring Invoice – Due Date Allowance – The number of days before a nearly created, recurring invoice, becomes due.
- Terms and conditions – The default terms and conditions that are displayed on an invoice. These terms can also be changed when creating or editing an invoice.