
Project Management
Managing your projects is very easy and intuitive. The place to start is the Project List Page.
You access this page via the main menu:
:: Main Menu > Projects
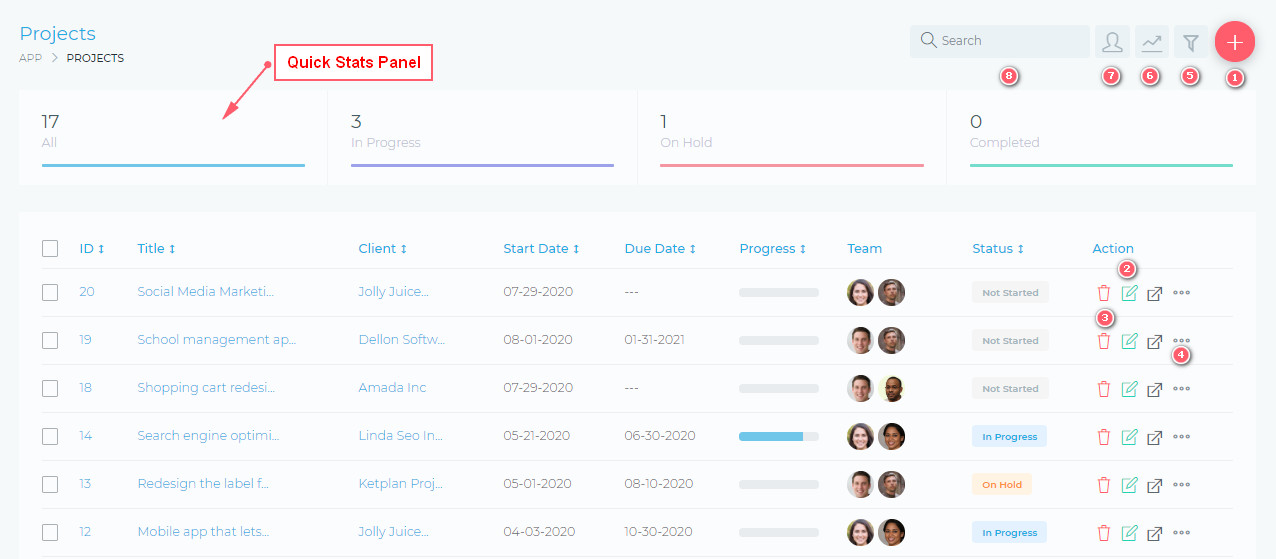
From this page, you are able to view and do the following:
- (1) Create a new project
- (2) Edit an existing project
- (3) Delete a project
- (4) Quickly manage additional project setting, via the quick actions, drop menu.
- (5) Filter projects, using a detailed filter panel. You can filter by project dates, categories, statuses, etc.
- (6) Toggle (hide/show) the Quick Stats panels
- (7) As the admin user, you can select to view all projects or only the projects that you are assigned to.
- (8) Search your projects, using the free text search box.
Create Projects
bstarCRM allows you to easily manage your projects. You are able to create projects, which you, your team, and your client, are all be able to share information and collaborate.
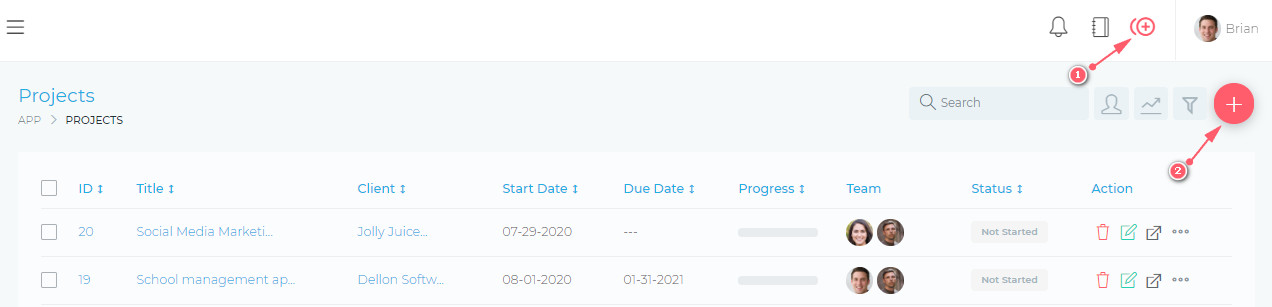
Creating A Project
You can create a new project by clicking on the (1) Quick Add icon or by clicking on the (2) Add Project Button.
Basic Mandatory information
-
- Project Title*
- Client*
- Start Date*
Optional information
-
- Deadline
- Assigned users
- Project Manager
- This user will have admin-level access to the project. They will be able to edit all the project’s information and settings. They will also be able to view all user’s tasks, assign users to tasks. The project manager is not able to delete the project.
- Billing information
- This allows you to specify how the project will be billed. The available options are:
- Fixed Billing
- Hourly Billing
- Estimated Hours enable you to monitor your working hours against what you have allowed for.
- Estimated Costs enable you to monitor your expenditure against what you have budgeted for.
- This allows you to specify how the project will be billed. The available options are:
- Project Description
- Assigned Users Permissions
- You are able to specify if team members can collaborate on tasks. This means they will be able to view each other’s tasks and also work within the tasks (commenting, attaching files, etc)
- Client Project Permissions
- You are able to specify the level of access the client will have on the project:
- View Tasks
- Tasks Participation
- The client will be able to comment, attach files, complete checklist, etc, within a task
- Create Tasks
- The client will be able to create new tasks for the project
- View Time Sheets
- View Expenses
- You are able to specify the level of access the client will have on the project:
- Project Progress
- You can set the progress to be calculated automatically (based on the completed tasks) or you can set it to be updated manually (you will be able to set the progress yourself)
- Category
- You can create categories via the settings dashboard. Categories can be anything that allows you to properly sort your projects (e.g. Design, Urgent, Web Development, etc)
- Tags
- Tags can be any text that allows you to easily identify or highlight important information about the project.
* Required information
Editing A Project
To edit a project, click on the Edit Icon, as shown in the image below:

Deleting A Project
To delete a project, click on the Delete Icon, as shown in the image below:

When you delete a project, all the items/resources linked to that project will also be deleted. The list below highlights some of the items that will be deleted.
- Invoices
- Tasks
- Files
- Comments
- etc etc
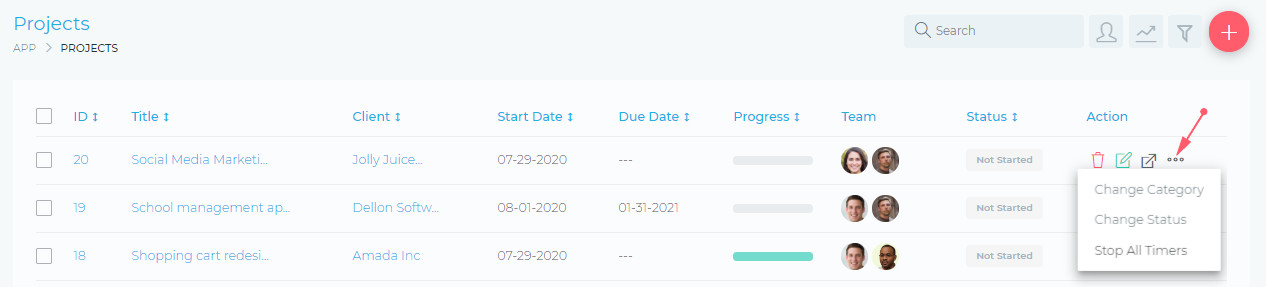
Addition Editing Options
You can access more options for editing your project, via the more icon, as shown in the image below
Project Management
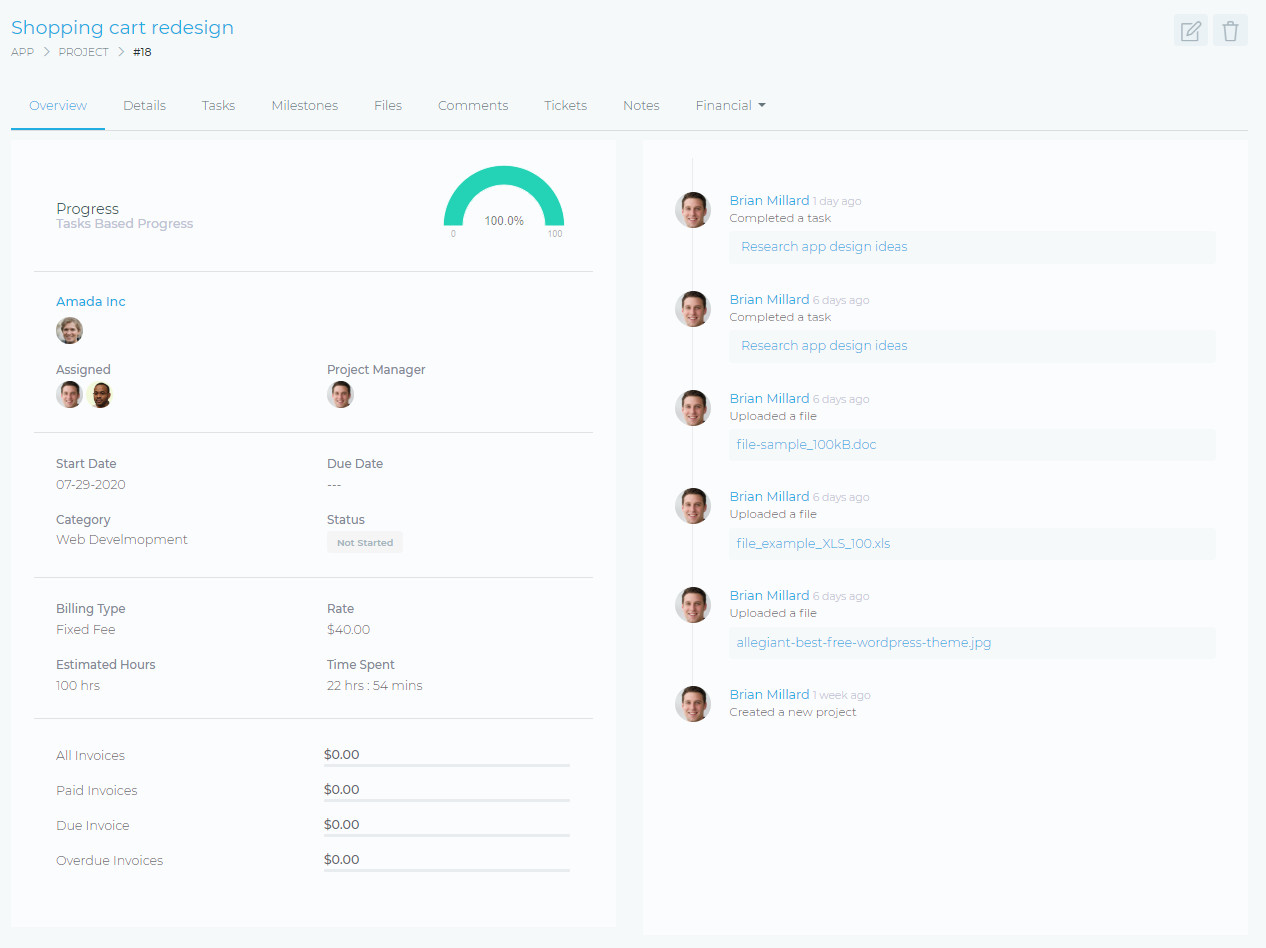
The Project Management section of the dashboard gives you easy access to all the resources linked to a project. From this section, you have access to view and manage items such as:
- Overview
- View the progress of the project
- View the project members
- View the dates of the project
- View the billing structure of the project
- View a summary of invoices and payments
- Event Timeline
- This shows you a historic summary of all the activity around a project.
- Tasks
- Files
- Support Tickets
- This section lists all the tickets that are associated with the client. You are also able to easily manage the support tickets from this section. Including, creating, editing, and deleting support tickets.
- Financial
- This section includes all the project’s financial resources, such as:
- Invoices
- Estimates
- Expenses
- Timesheets
- This section includes all the project’s financial resources, such as:
- Notes – You can create notes relating to the project. These notes are not visible to the client. They are visible to the rest of your team.
- Edit the project
- Delete the project
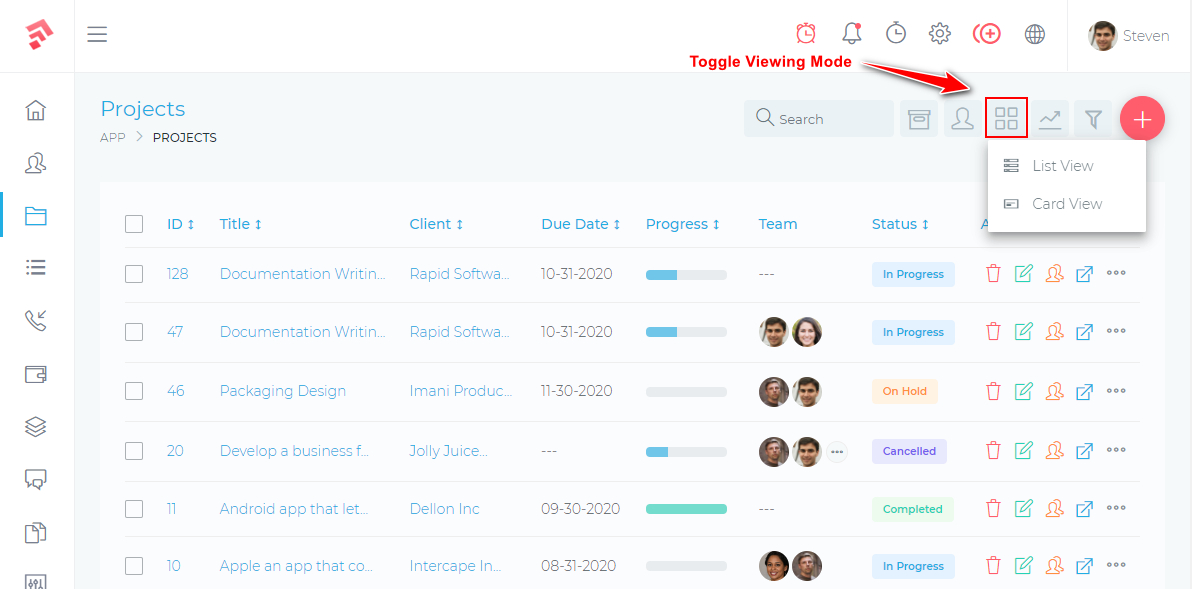
Views (List, Card)
Below are the different views that are available for projects. Views are set on a per-user basis. This means that each user can set their own view mode without it affecting other users.
You can toggle between different views, using the button that is shown in the images below.
List View
This is the standard view mode. In this mode, projects are displayed in a table list format.
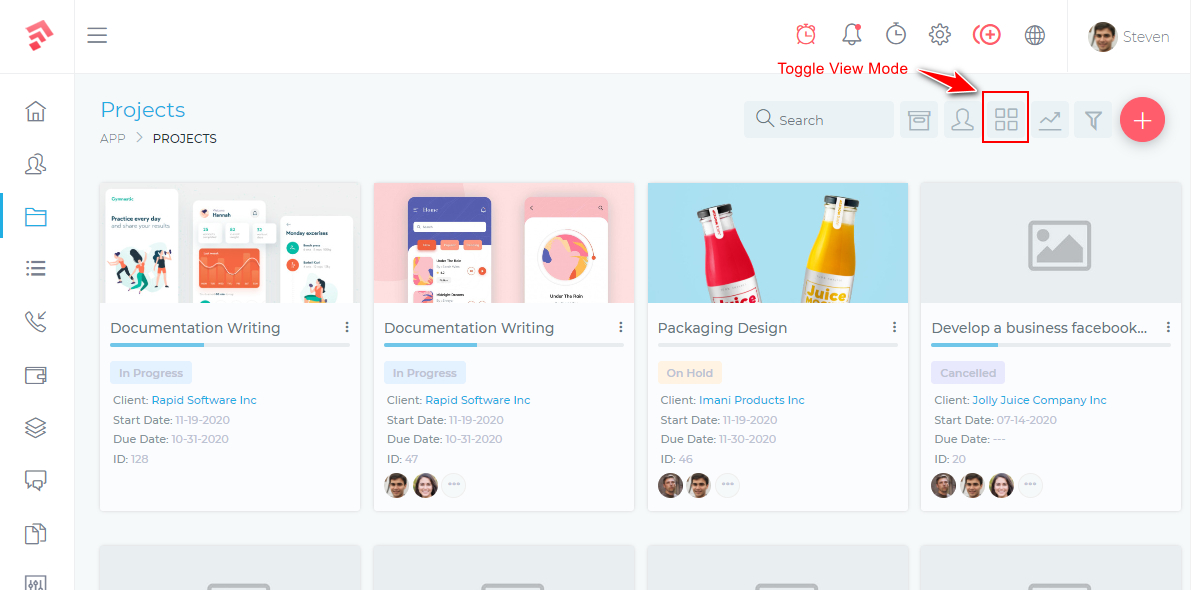
Card View
To access this view mode, click the toggle button that is shown in the image below. This view mode also displays the project cover images (if this feature is enabled).
Custom Fields
Custom fields allow you to extend the data that you can collect about your clients. This data will be in addition to the standard form fields that are available when you add/create a new project.
To get started, go to:
App > Setttings > Projects > Custom Fields
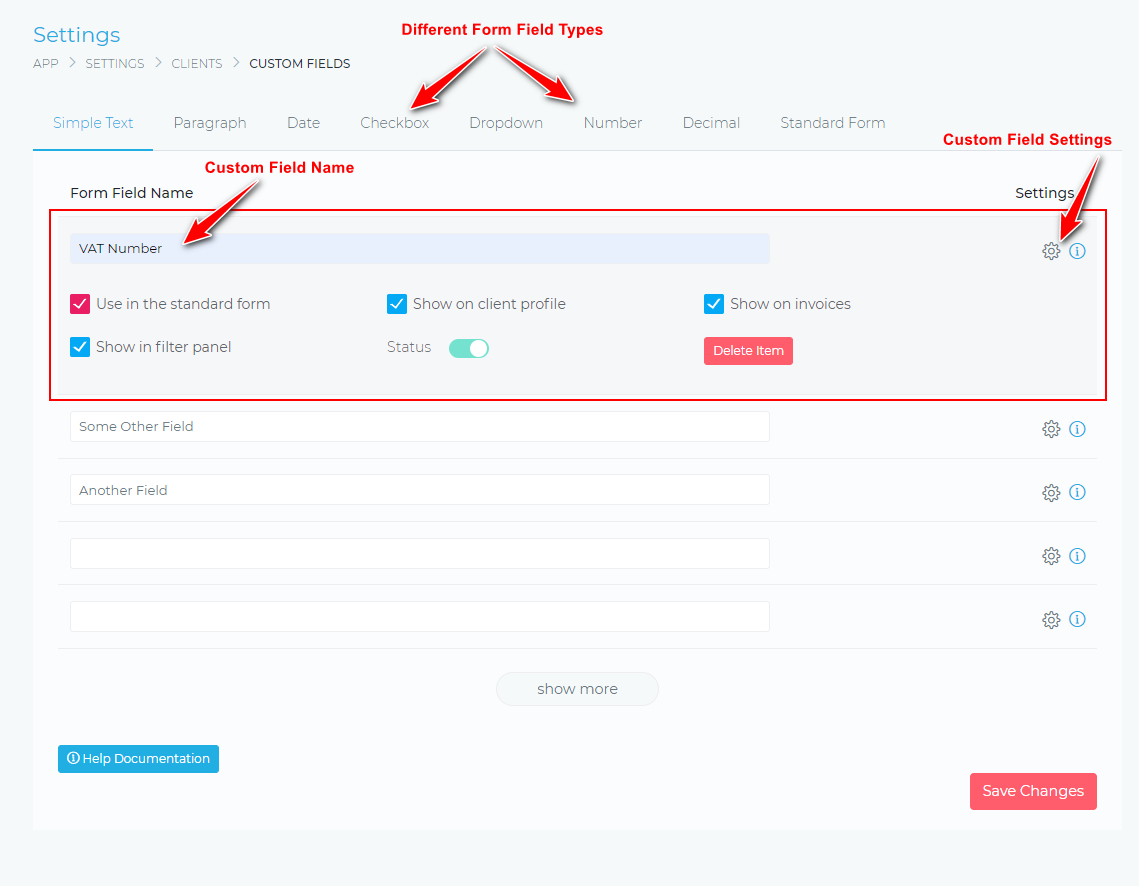
You will be able to create different types of form fields
- Simple Text
- Paragraph (Long Text)
- Number
- Drop Down List
- Check Box
- Decimal
- Date
You will also be able to tweak some settings about your form field, such as
- Use in the standard form – This means the field will be displayed in the “Add New Project” form
- Show on project profile – This means the data will be displayed on the project profile page
- Show in filter panel – This will make the field available when you are searching and filtering your projects
Form Options
You can further tweak how the form fields will be displayed in the “Add New Project” form. To do this, click on the Standard Form menu item (as shown below)
You will be able to do the following:
- Reorder the form fields (drag & drop)
- Specify if the form field is mandatory (required)

Project Settings
The project settings page allows you to change various aspects of how the Dashboard handles projects. Below are the settings and their explanations.
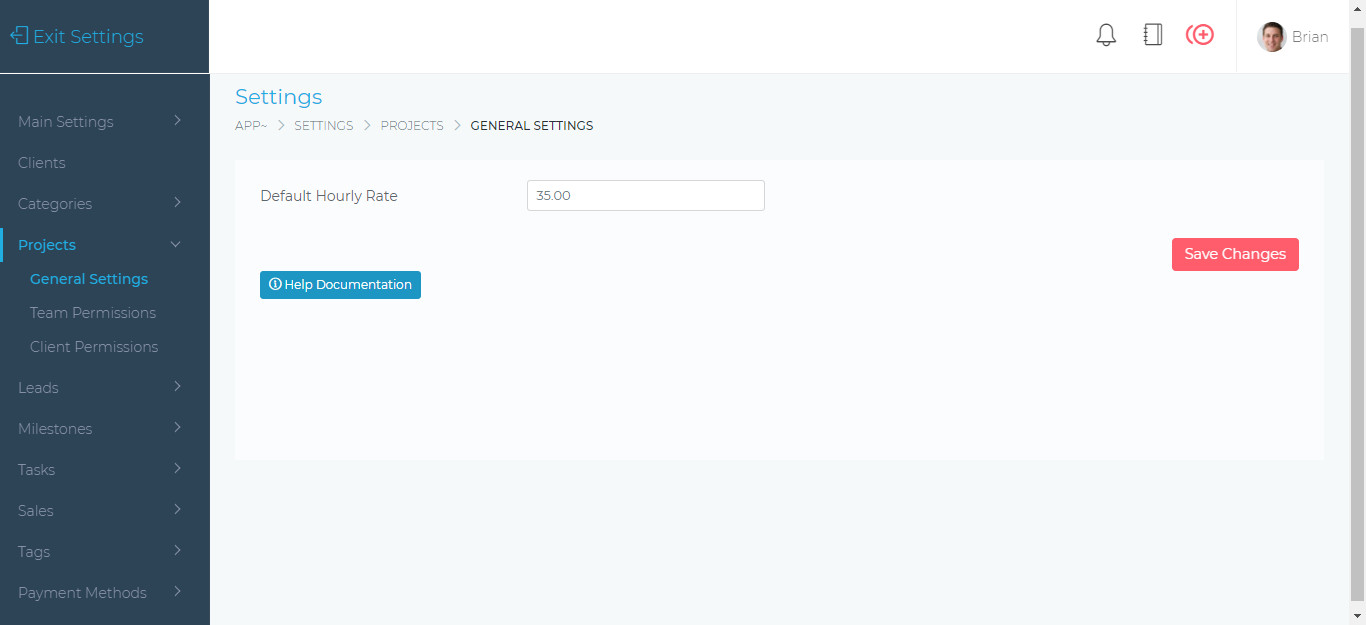
General Settings
From this page, you can set the following information;
- Default Hourly Rate – This is the hourly rate that is automatically applied to a new project. This can however be changed when creating or editing a project.
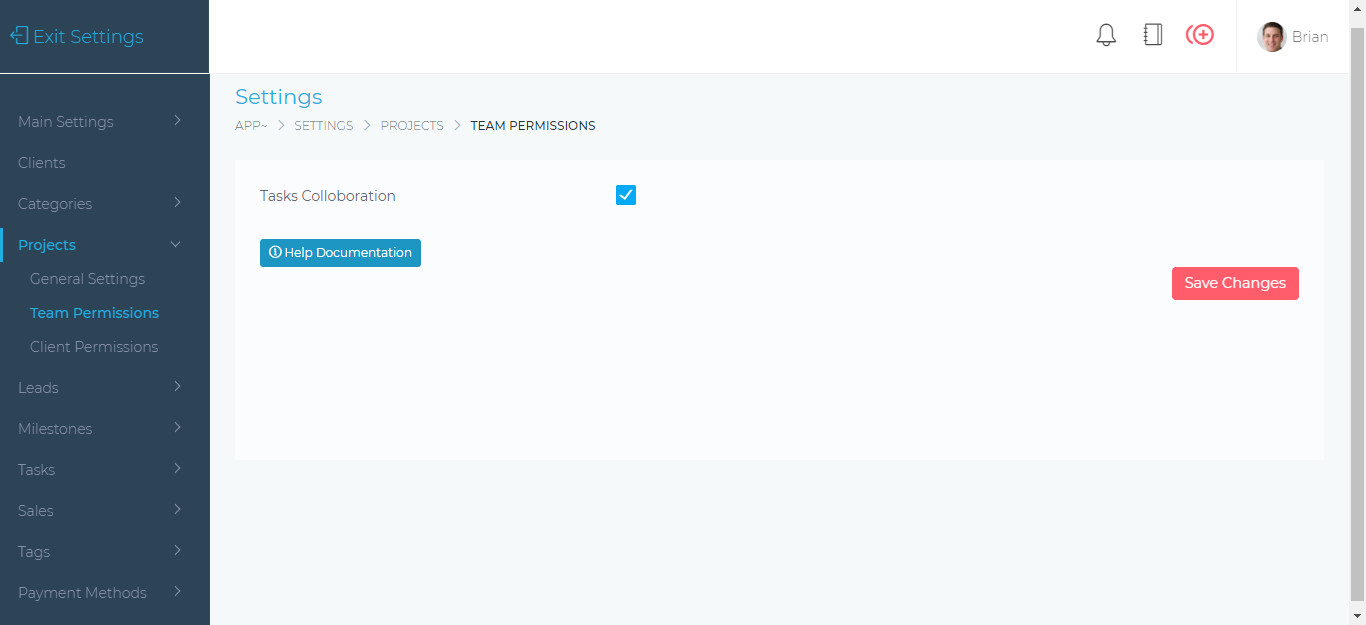
Team Permissions
From this page, you are able to set the Task Collaboration option.
When the option is enabled, all team members who are assigned to a project will be able to work together on the project’s tasks, as follows;
- View everyone’s tasks.
- Edit everyone’s tasks.
- Comment, upload files, create checklists, etc, on everyone’s tasks.
Client Permissions
These are the default settings that determine the level of permissions that a client user has, on a project.
These default setting can also be changed when a project is being created or edited
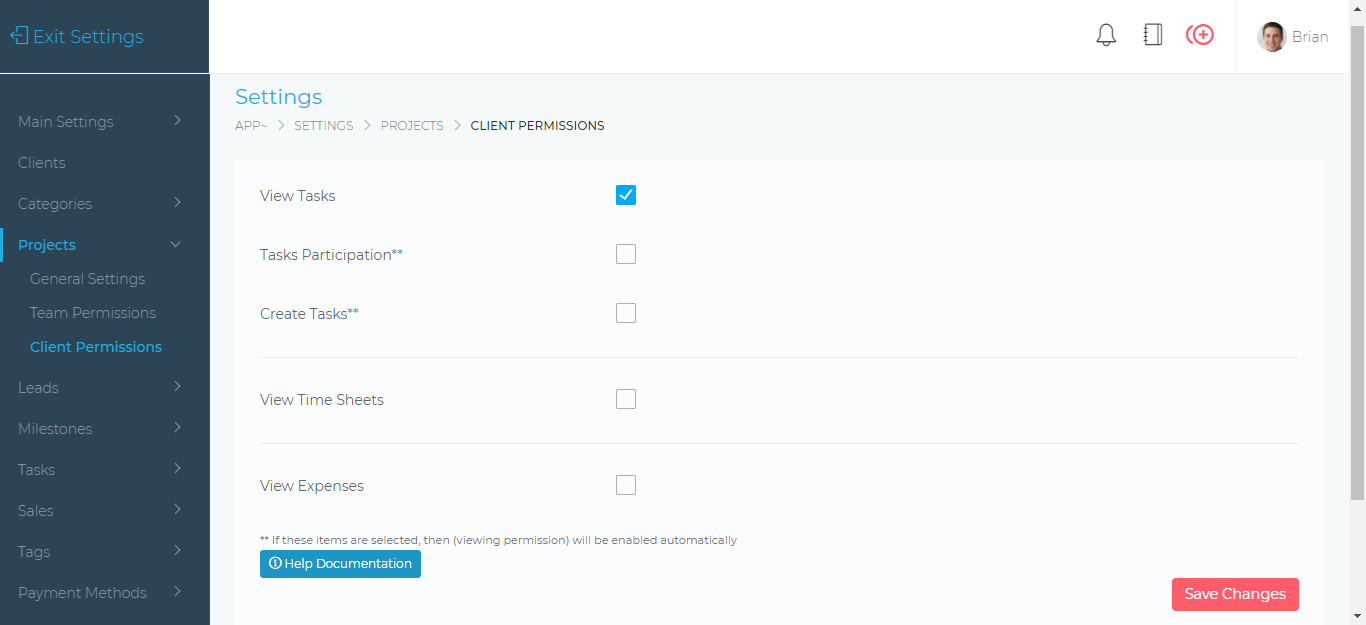
- View Tasks – When enabled, the client will be able to view all tasks that are created on their project.
- Tasks Participation – When enabled, the client will be able to comment, attach files, create checklists, etc, on the project.
- Create Tasks – When enabled, a client will be able to create new tasks for their project.
- View Time Sheets – When enabled, the client will be able to see all the time logged by team members on their project.
- View Expenses – When enabled, the client will be able to view all expenses record on their project